Mathmonster:
Interactive Arithmetic Equation Board
Overview:
MathMonster was inspired by the desire to help elementary school students who are struggling with basic arithmetic. My team and I recognized the frustration and overwhelming feelings these students experience, despite the best efforts made by their teachers. Seeing this issue in our community motivated us to create a better learning experience for foundational skills. We hope that our product will provide an alternative approach for those who find the current curriculum insufficient, and ultimately help them succeed in their math studies.
The National Academy of Engineering’s (NAE) “Advance Personalized Learning” Grand Challenge encouraged us to develop an innovative solution that meets the diverse learning needs of elementary students. By combining our passion for helping students, with an engineering focus on personalized learning, we developed a product that aims to improve the learning experience for all students, regardless of their background or education level.
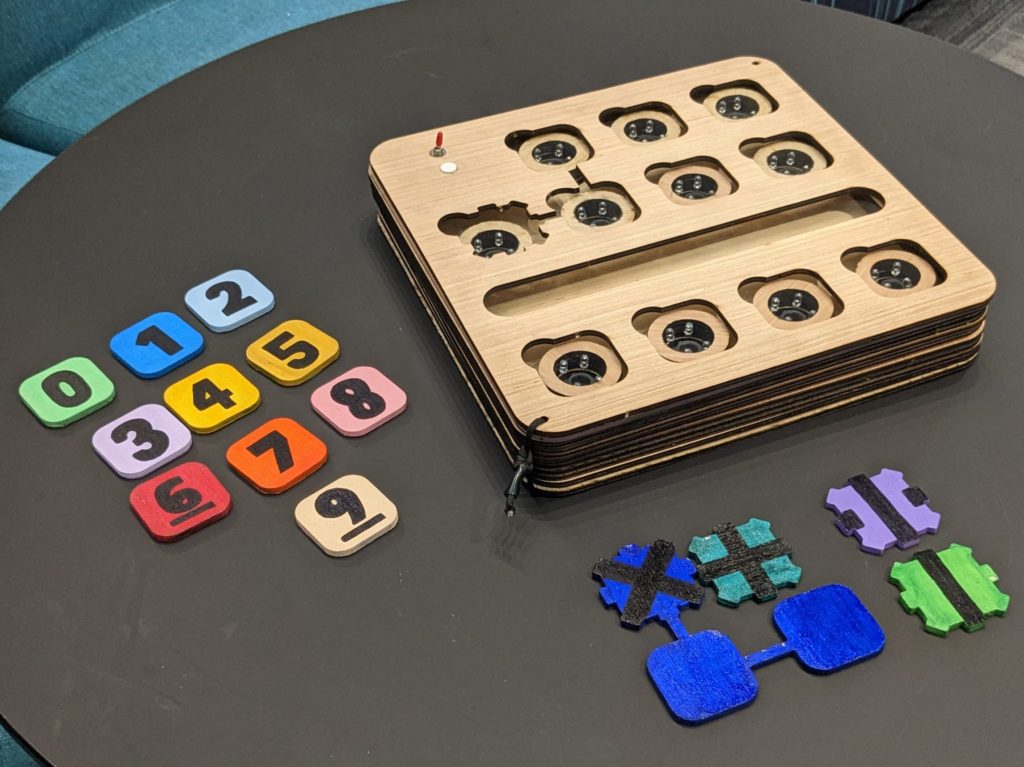
MathMonster provides an enjoyable and interactive way for elementary aged students to improve their math skills. By using physical tiles and visual feedback, students can create and solve equations while receiving immediate feedback on their accuracy. Overall, the product is designed to reinforce the user’s understanding of addition, subtraction, multiplication, and division.
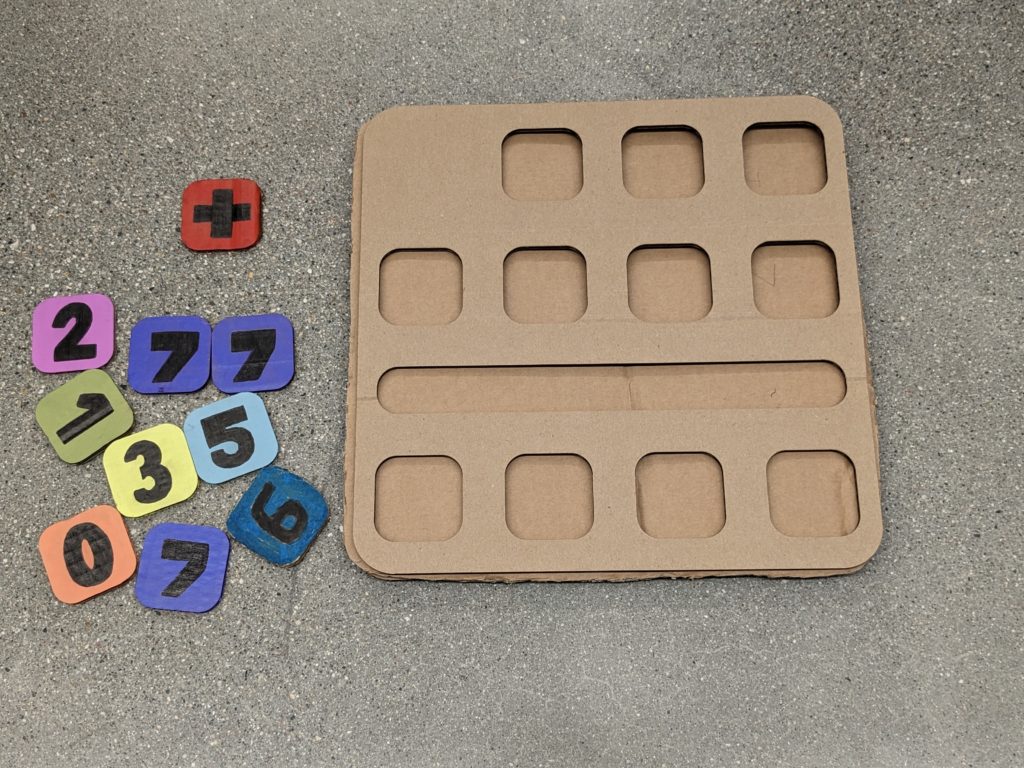
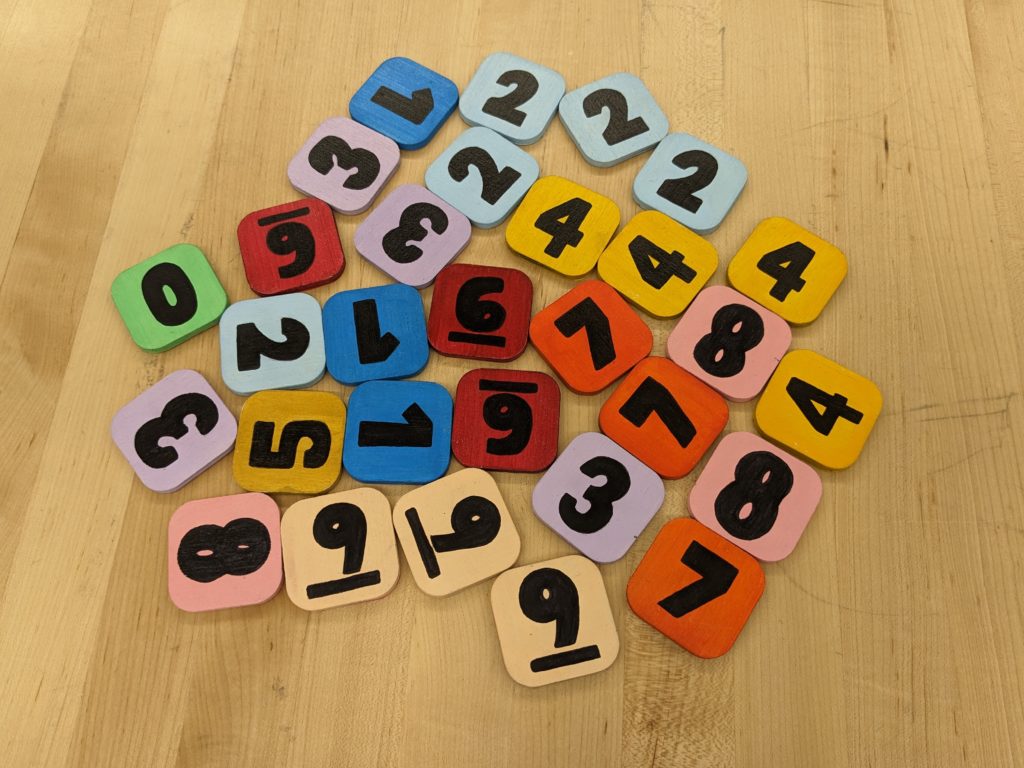
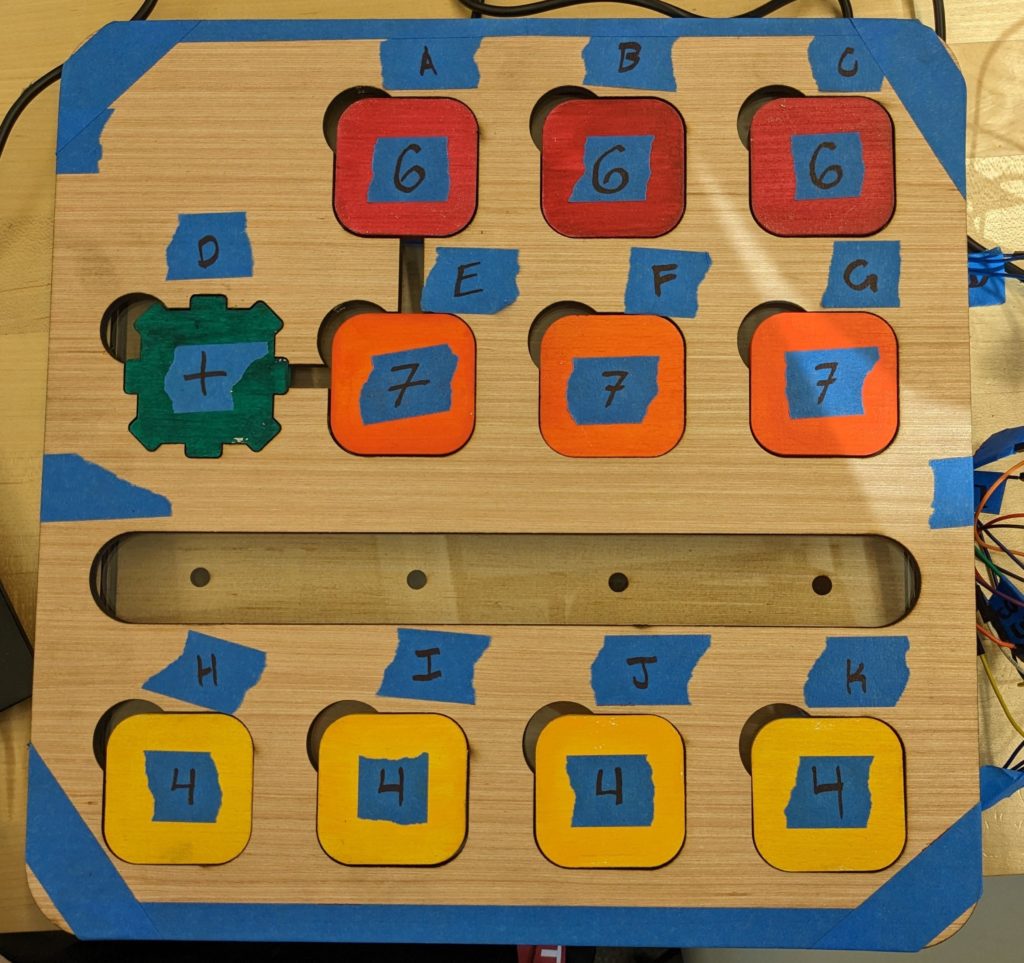
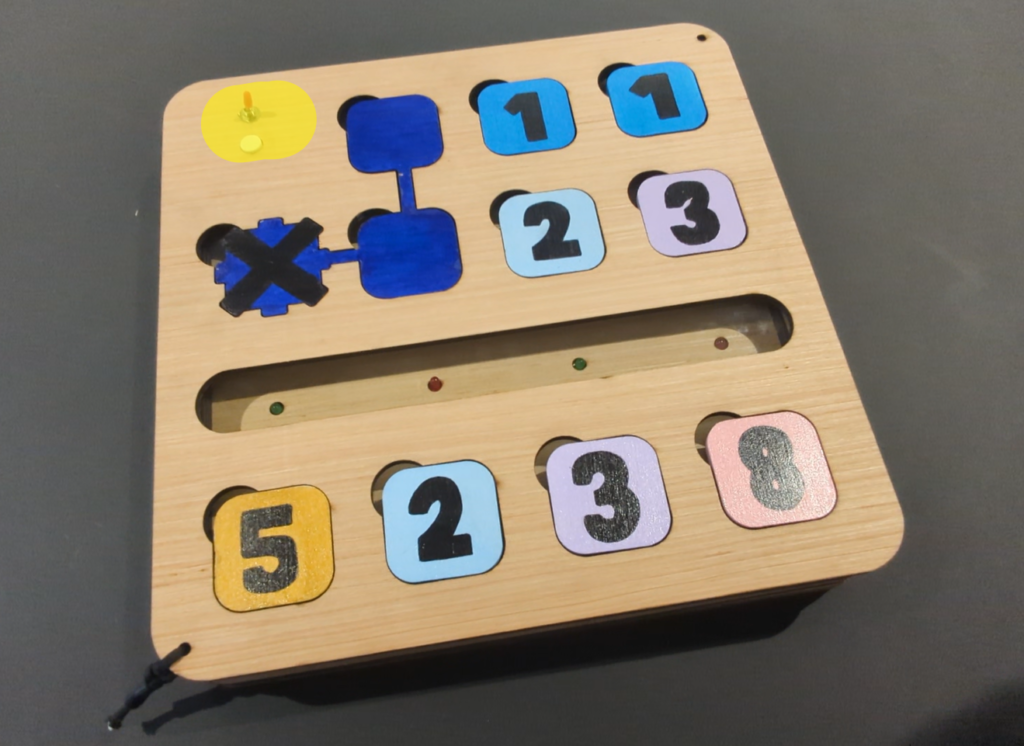
Shown to the left is the MathMonster board itself, operation tiles, as well as some number tiles.
Process:
Sketches and Planning
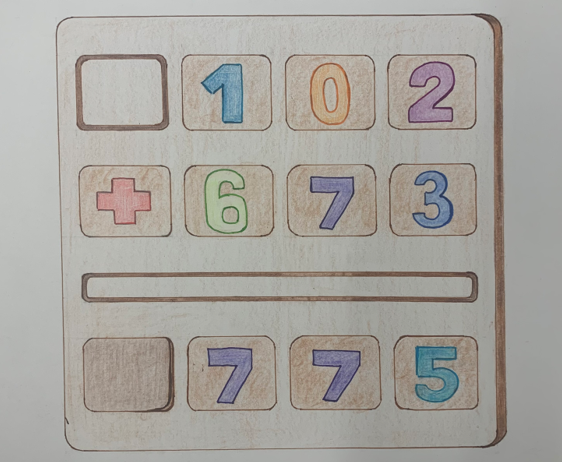
Shown below is the concept art created for our product
MathMonster: Interactive Equation Board
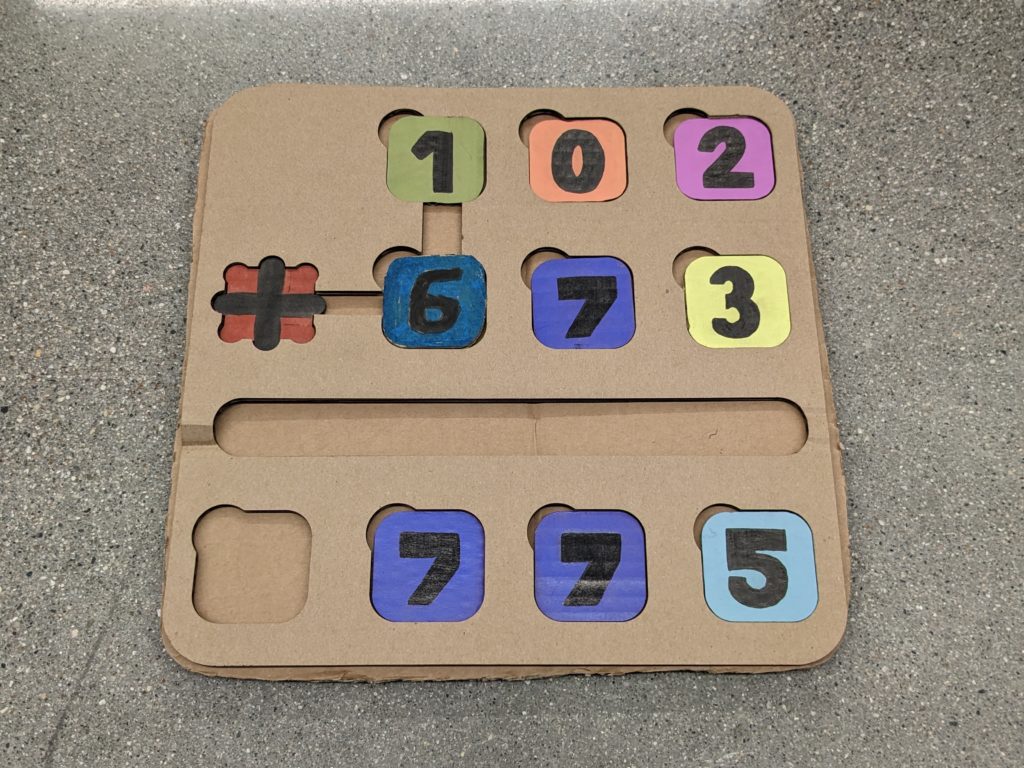
This product will allow a student to form equations to solve, as well as practice their math comprehension. The board can support the application of multiplication, addition, subtraction, and addition. A student would use this board alongside a math worksheet or equations the teacher provides. Instead of just writing down an answer, the students will be able to interact with a physical object to build the equation.
The tiles (numbers and symbol) will be placed in recessed slots in order to build the equations shown above. The child could also use the board to build equations of their own once finished with the assigned work.
cad Models (SOLIDWORKS)
Once we figured out the dimensions and sizing, We then created the SOLIDWORKS CAD models for MathMonster.
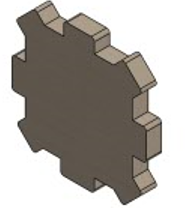
(Number/Operation tile)
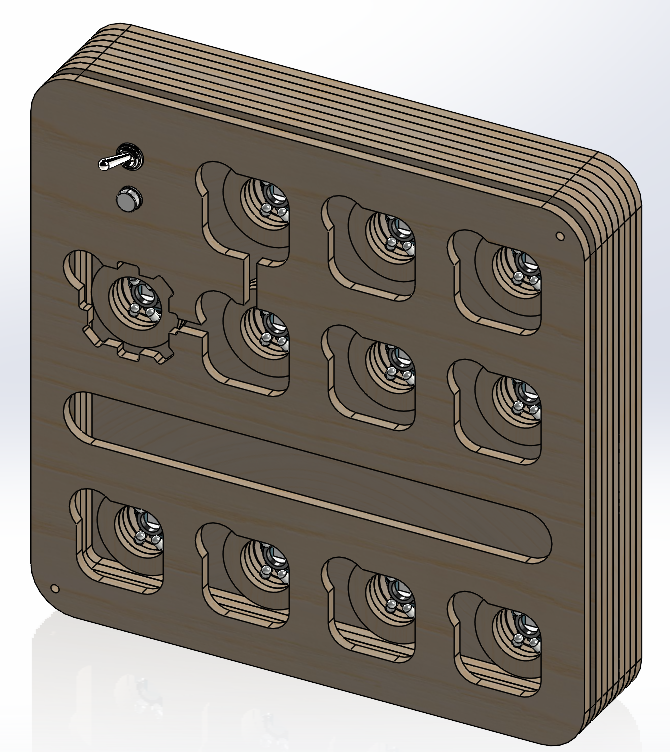
(Complete MathMonster CAD Model)
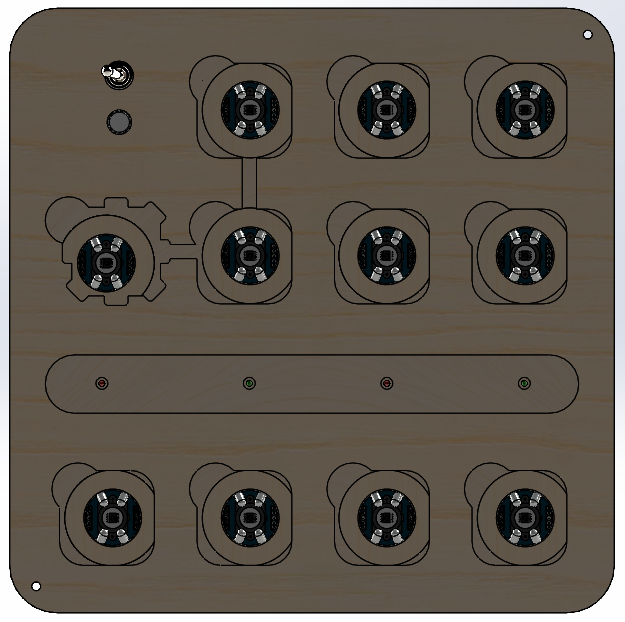
(Front of MathMonster)
PrototypeS
Several prototypes of MathMonster was created before the final product was fine-tuned to perfection.
Prototype # 1
This cardboard prototype allowed us to determine how all the components would fit together as well as how the MathMonster would look and act.
Issues:
– Tiles once placed in the slots on the board were not easily removable.
– Lack of slots needed when performing 3 x 2 multiplication.
Solutions:
– Finger notches added to each of the hole cut outs.
-Created an L-shaped tile which covers the first column, thus limiting the multiplication that can be performed to a 2 x 2 equation.
(Revised prototype #1 with notches)
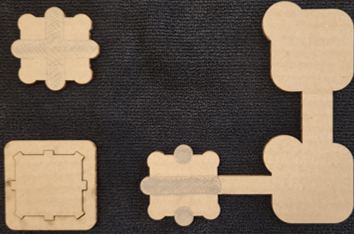
(Old version tiles vs L-shaped operation tile)
Prototype #2
This second prototype allowed us to get a better understanding of how the final color sensors, housing components, and electrical system would work and operate.
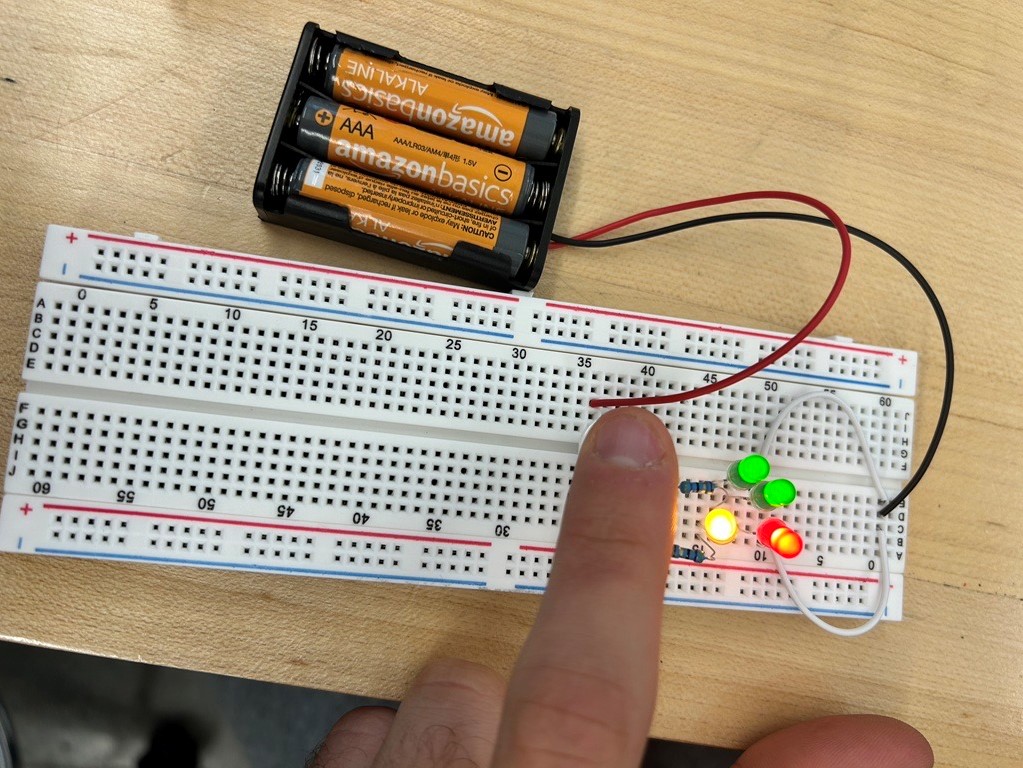
(Testing out the lights for light bar)
(Work-in-progress number tiles)
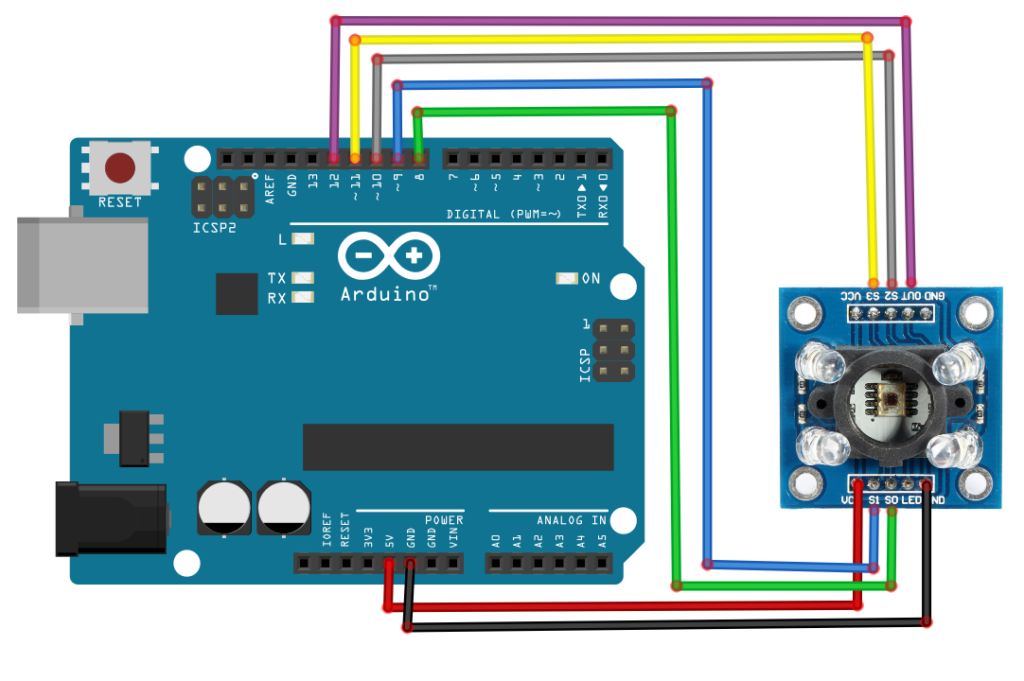
(Wiring diagram for color sensors)
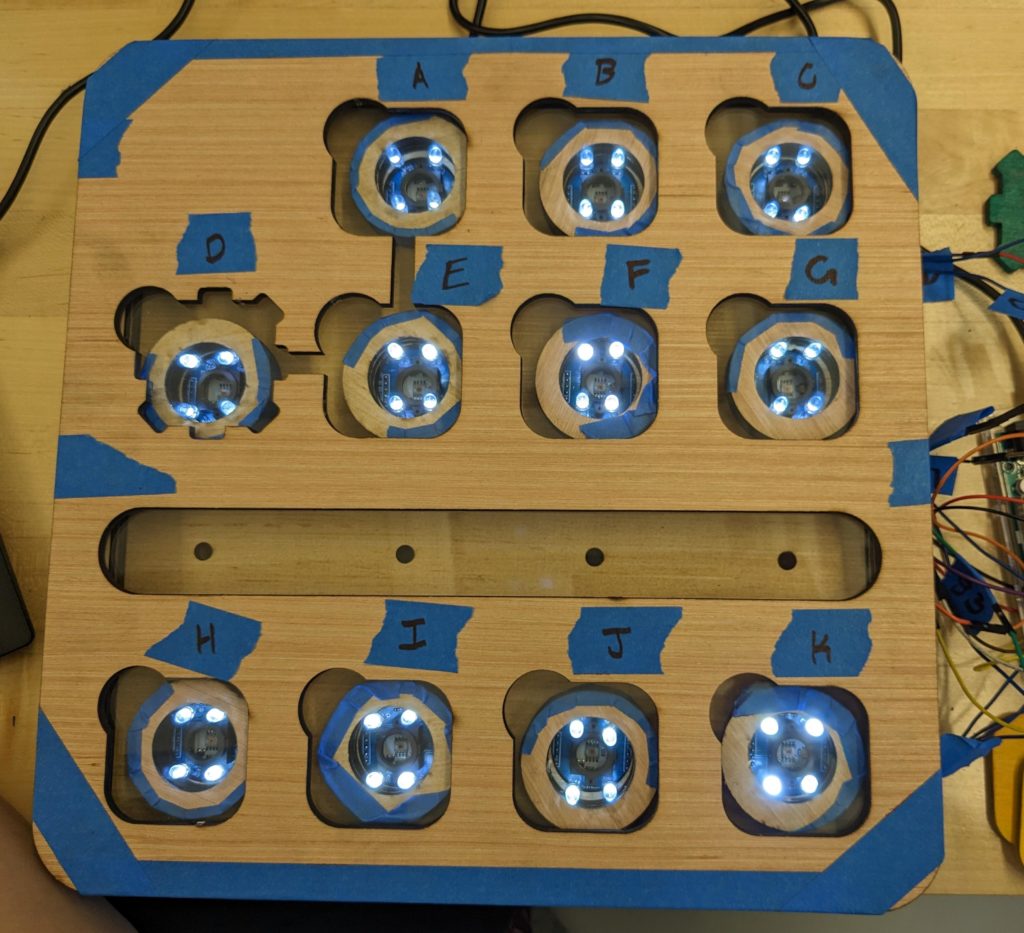
Final Version
![]()
This final prototype displayed above represents our final design, one that could potentially be available for purchase in the current market.
A submit button has also been built into the board to allow for the user to check with MathMonster when they believe the equation they have constructed is correct. To prevent previously built equations from being stored, activating this button will also reset the board.
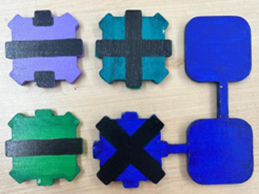
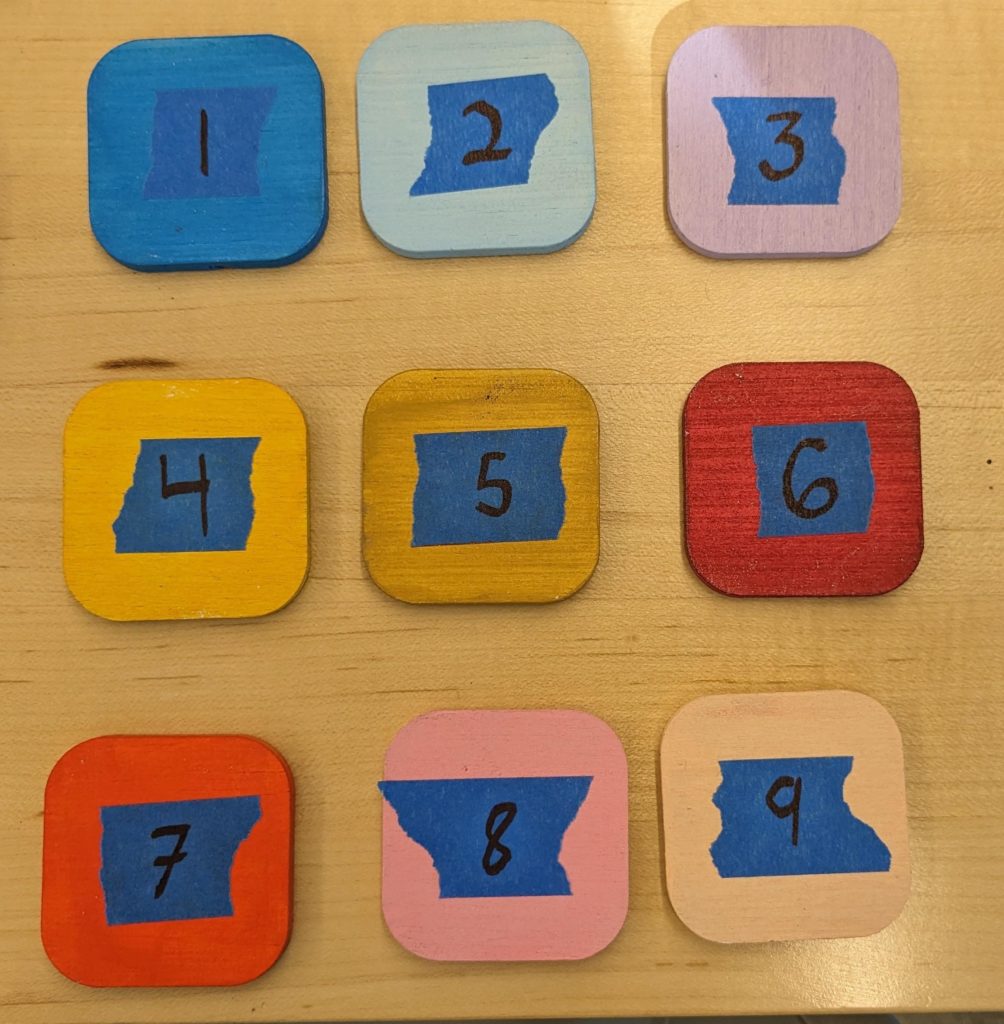
(Operation Tiles)
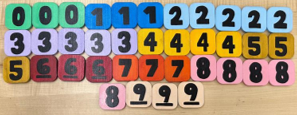
(Number Tiles)
All tiles (Operation & Numerical) are lettered with black numbers/symbols on their faces. Additionally, the corners are rounded to ensure the user can easily place/remove the tile into/out of the slots of the board.
Construction & Finishing touches :
Shown below are the progress photos taken of MathMonster becoming a reality.
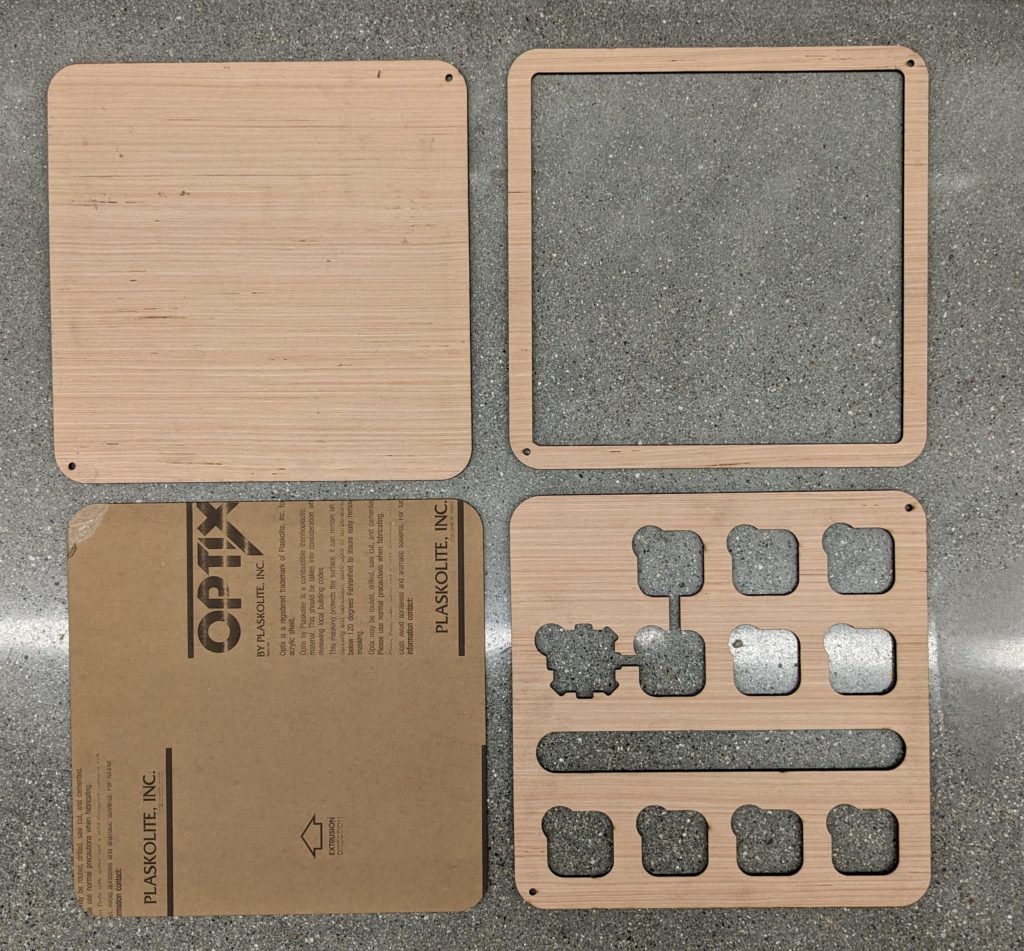
(Laser cut board components)
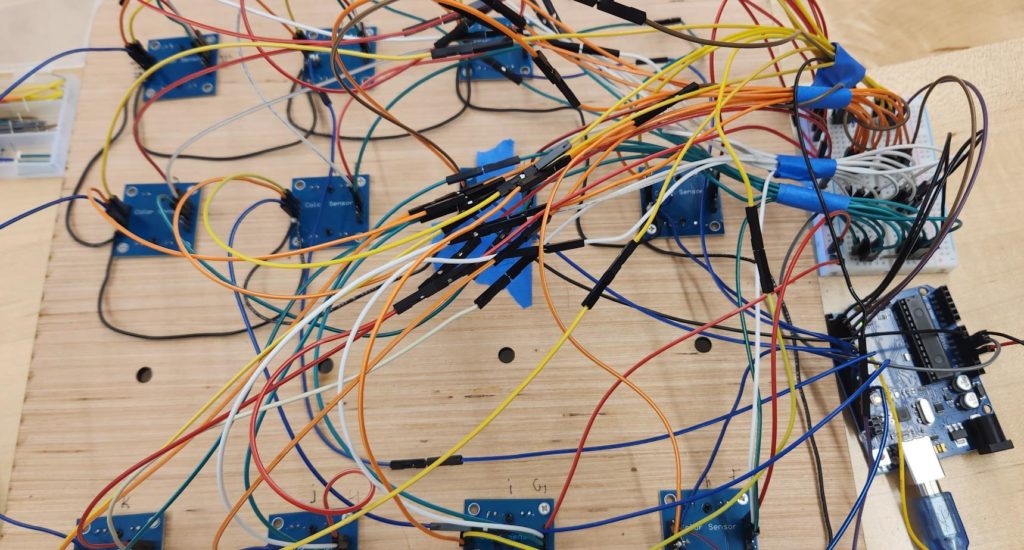
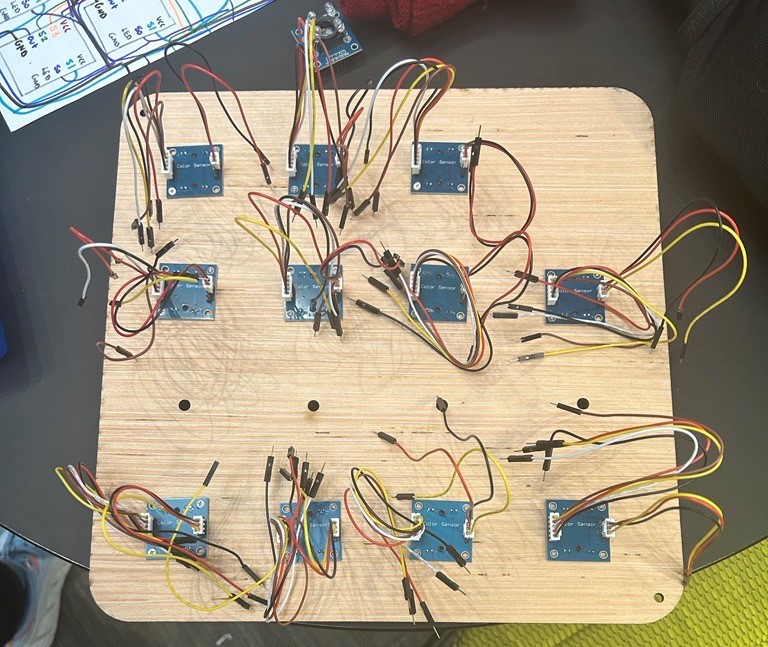
(Wiring up MathMonster)
 (Painting the number/operator tiles)
(Testing MathMonster)
(Completed MathMonster & Number/Operation Tiles)
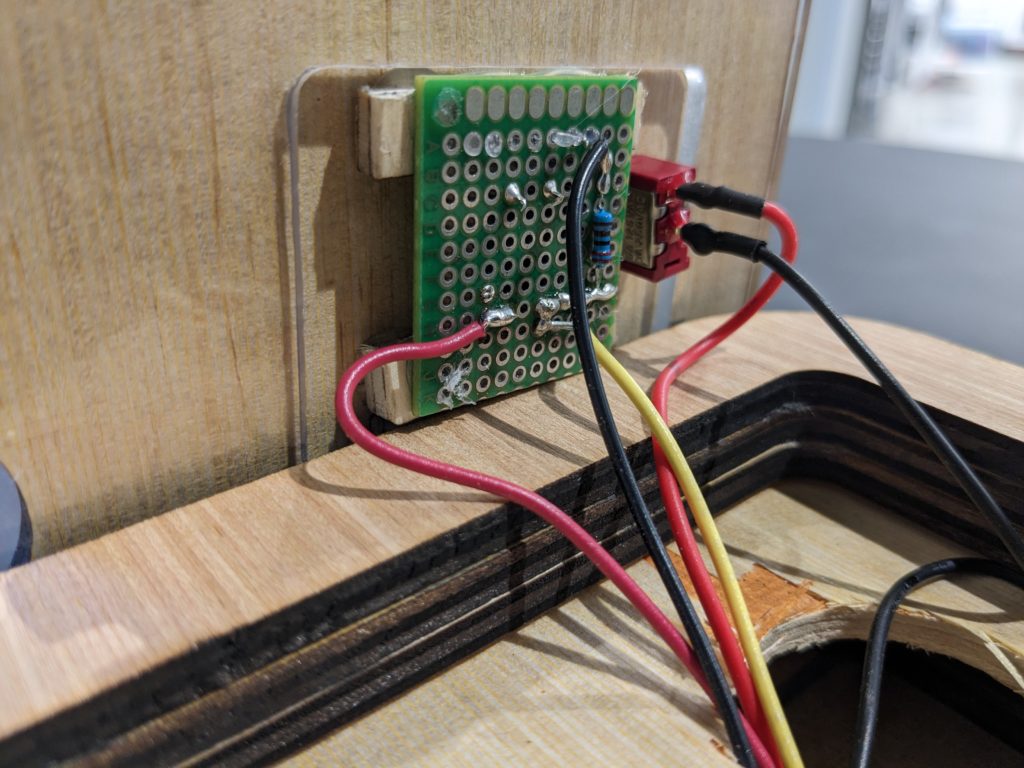
(Soldering electronics)
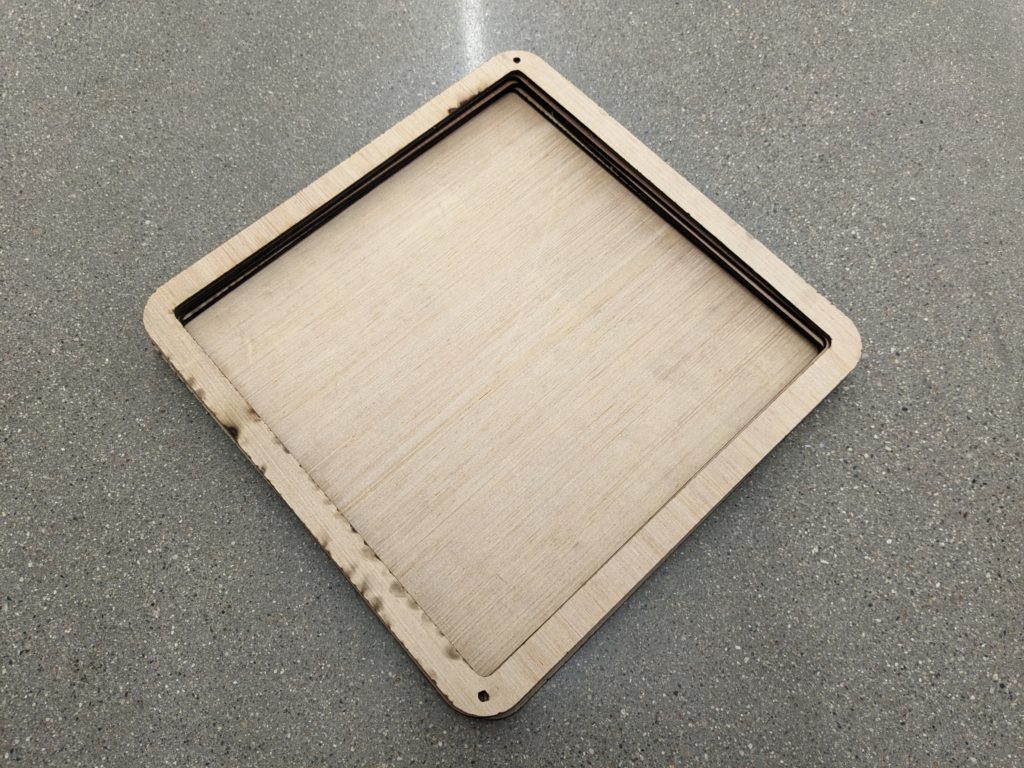
(Creating the enclosed base)
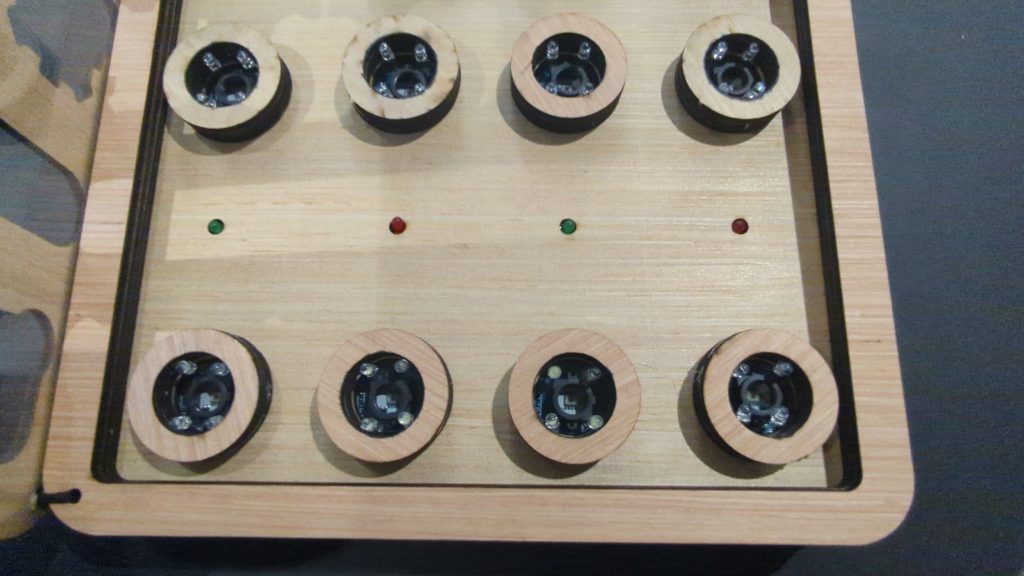
(Installing the color sensors)
functionality of MathMonster:
MathMonster is a uniquely engineered electronic math board that supports students in learning simple arithmetic through personalized learning; giving kids creative freedom to build and test their own equations.
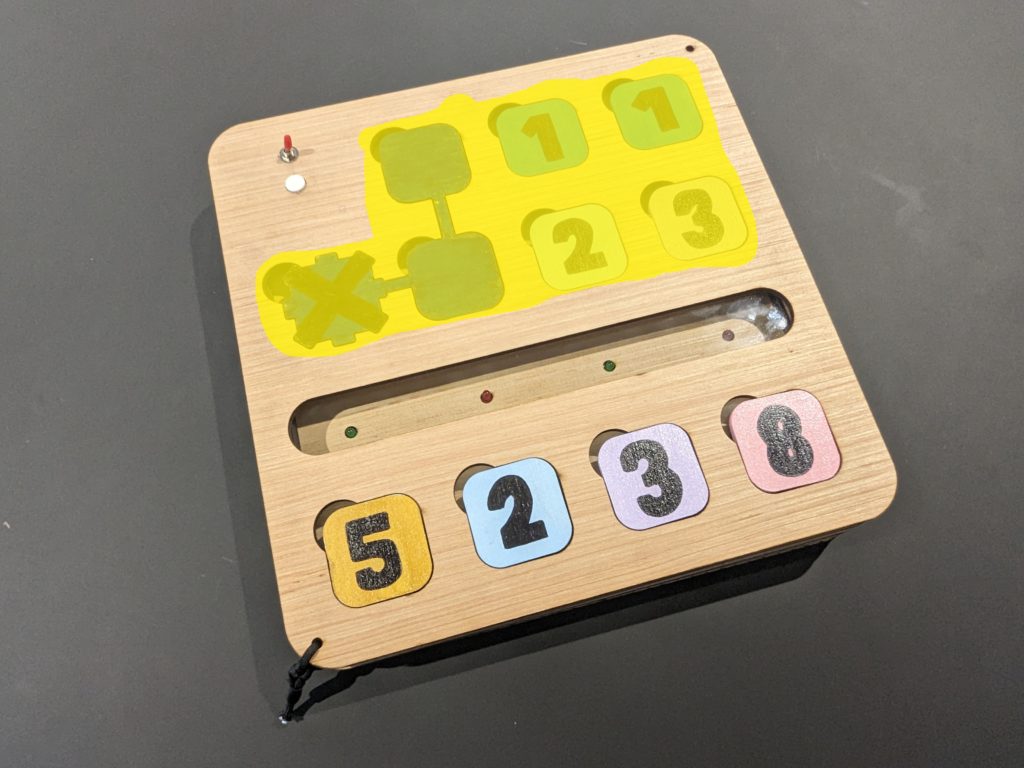
User creates equation in top highlighted section of the board.
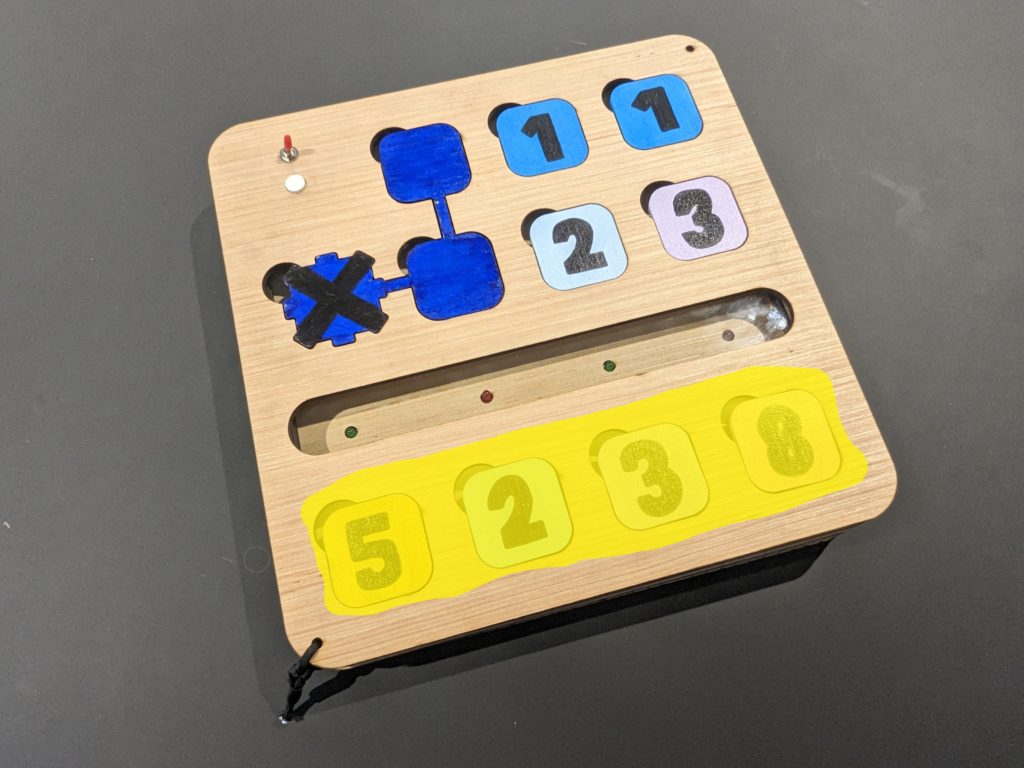
User forms answer in bottom highlighted section of the board.
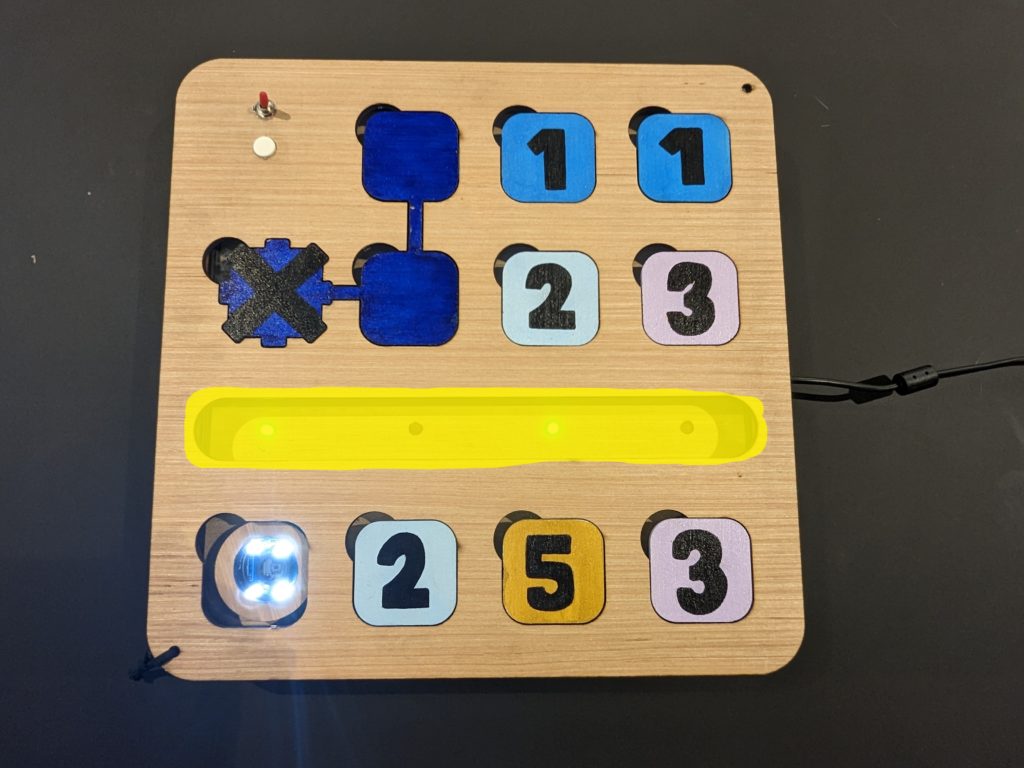 Light bar will inform the user is the answer they put in is correct/incorrect.
User presses submit button once they are done. MathMonster now checks the answer.
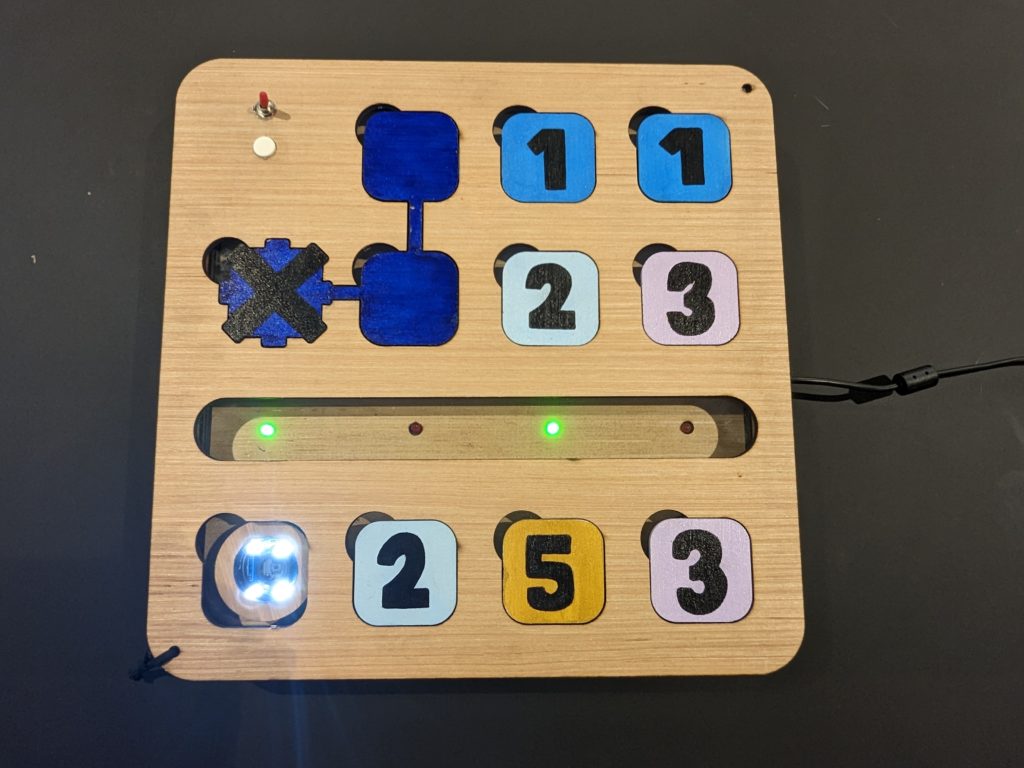
If answer is correct, light bar illuminates green.
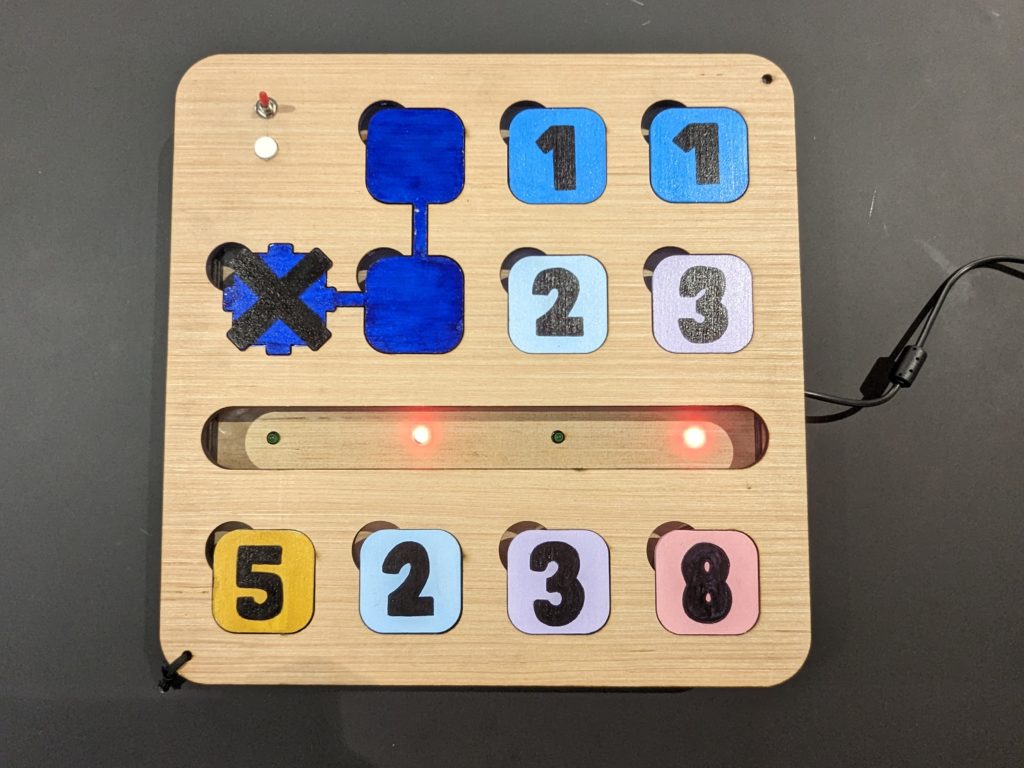
If answer is incorrect, light bar illuminates red.
Programming & Wiring
Electrical Components:
11 color sensors have been attached to the board with two three-sixteenth inch screws diagonal to each other. The wiring consists of the VCC, GND, S0, S1, S2, and S3 pins of each sensor all being soldered into one individual wire and running to the associated pin. The output for each sensor stayed separate.
The final circuit design is comprised of the wires from the color sensors and four LEDs (two red, two green) running to an Arduino Due, which will be powered by two battery packs (of three triple A batteries) in parallel. The batteries also connect to two buttons (power and submit).
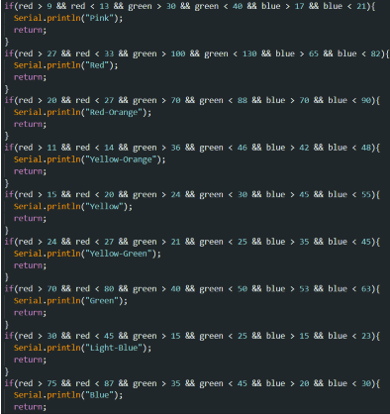
Programming:
The code for the system consists of a RGB library that takes in the individual pin locations of each sensor and assigns them an ID. The main code will be activated by the submit button, which will activate the eleven color sensors in order, converting the RGB into a mapped integer, while simultaneously performing calculations on the whole concatenated equation. Based on whether the equation is true or false, the LEDs will turn red (incorrect) or green (correct).

Skills gained & takeaway:
- Further enhanced and practiced my CAD Skills
- Learned how to be successful in a large group setting in a fast paced collaborative environment.
- Practiced my time management, communication, problem solving, and design skills.
- Crafted documents that meet demands and constraints of professional situations; integrating all stages of the writing process.
Having the opportunity to be involved in the creation of “MathMonster, allowed me to practice engineering principles, build upon my skills/learn new ones, as well as connect with my teammates in a fun, hands-on environment.
MathMonster is a testament to the hard work and dedication of our team, who have taken feedback and suggestions from multiple sources to create a product that is functional, user-friendly, and aesthetically pleasing.