TReasure Mountain:
Fine Motor Skill Puzzle tOY
Overview:
For this project, my team and I worked with REACH Services, which is a local therapy center dedicated to assisting children with disabilities and helping them grow & thrive. One of the problems we noticed from our visit is that there were some children who had issues with fine motor skills. This is a big concern as these skills affect their ability to complete everyday tasks in life and school. That is why we have come up with a toy that provides sensory input and stimulation all while allowing a child to practice their fine motor skills in a fun and engaging way.
![]()
Treasure Mountain was especially designed for children to practice gross and fine motor skills as well as exercise problem-solving. The objective of the user is to explore the mountain and find the buried treasure inside. In the process, the user will contend with a series of layers and puzzles that get progressively more difficult.
Unique aspects of the design are its ability to be customized by parents and therapists. The treasure, or prize, can be easily customized to incentivize specific users to explore the toy. Additionally, the size of prizes can be adjusted to meet the safety needs of every user age group. The prize can be changed time after time, so Treasure Mountain is expected to keep children engaged for repeated use and enjoyment.
Process:
Sketches and Planning
Shown below is concept art for the toy itself.
Element Layers:
The toy consists of 4 main layers: the lava, the mountain, the inner chamber, and the treasure chest. Each layer has a problem for the user to solve.
The materials of the toy will consist of minimal hardware, plastic resin, polyester thermoplastic plastic, and wooden parts. Parts and components of the mountain are brightly colored and realistically textured for the added sensory stimulation of the user.
Solidworks cad
Once we figured out the dimensions and sizing, We then created the SOLIDWORKS CAD models for the shapes. These pieces will be 3d printed except for the base which will be cut from wood.
Color Reference Legend:
Orange = Button
Green = Rod
Black = Wedge
Brown = Two main panels
Dark gold = Inner chamber lid
Pale yellow = Inner chamber body
Red = Base plate
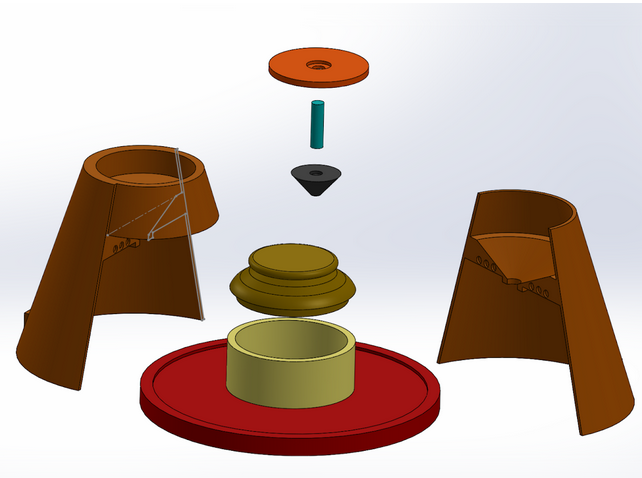
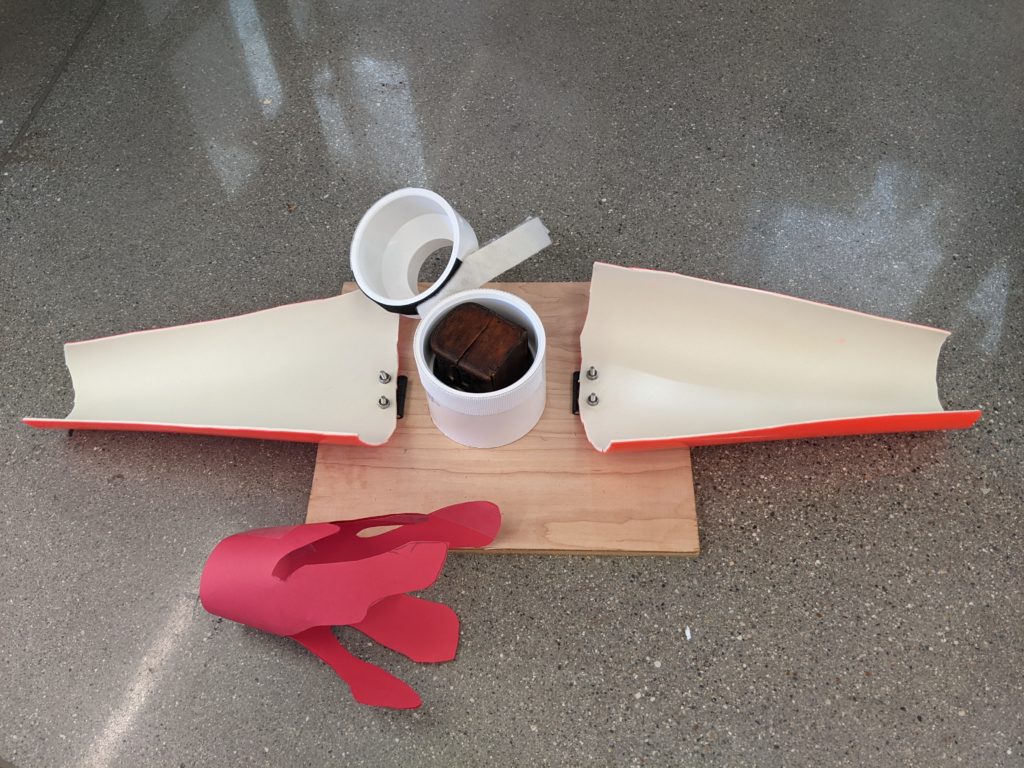
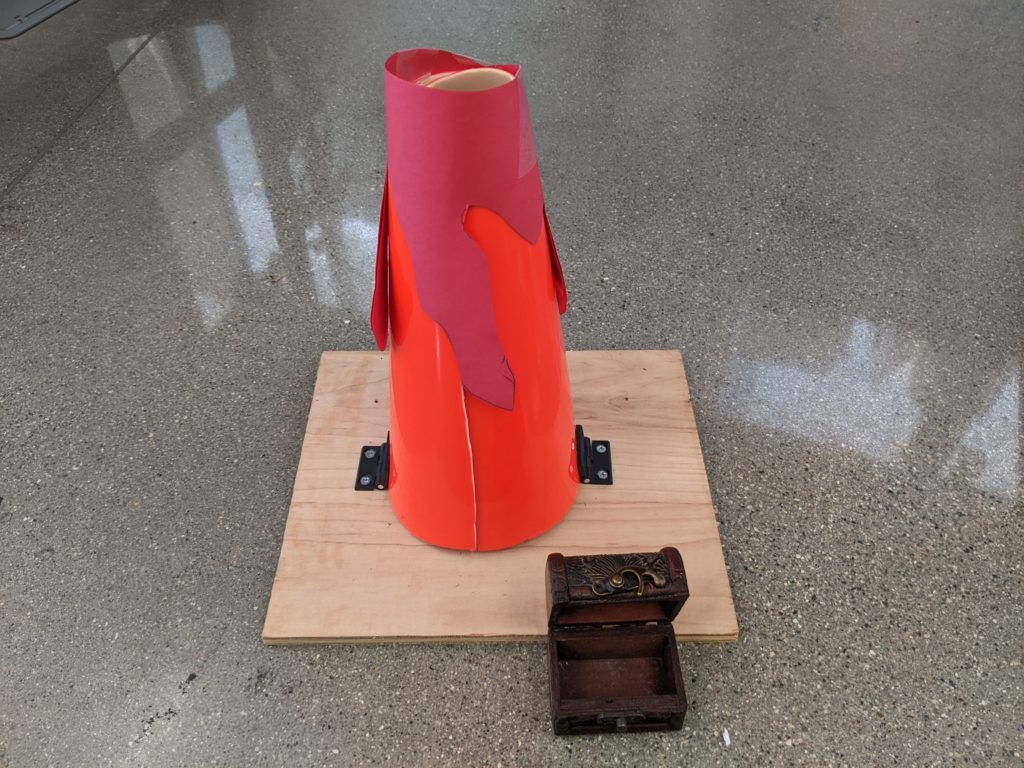
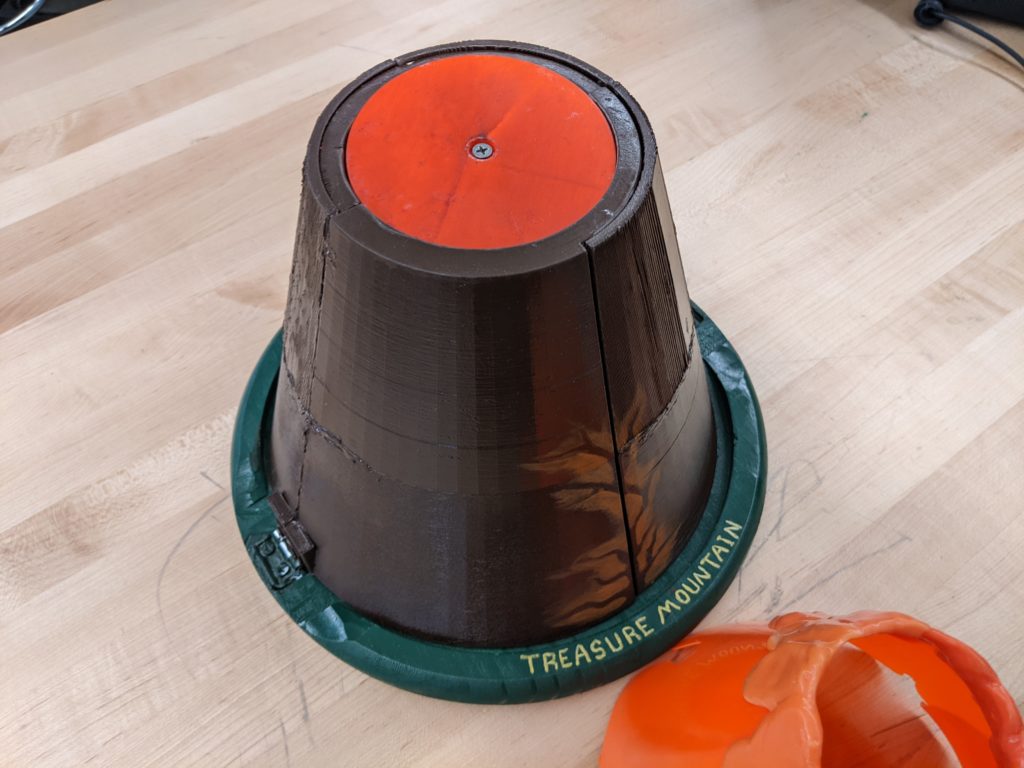
To properly operate this toy a user/child must first lift off the outer “lava” layer from the main body of the mountain. Next, they will need to search with their hands or visually to find the button (located at the top of the mountain) and compress it. When pressed, it allows the user to have a newly formed handhold on the edges of the mountain’s top. At this stage, the user can freely pull the mountain apart, break the strength of magnets, and let the two panels then fall away revealing an inner chamber with a lid. As the panels fall, they pivot on hinges fixed to the base plate which keeps them connected to the rest of the system. The inner chamber’s lid must be removed via the pulling apart of velcro straps. Once this lid is removed the treasure chest is revealed. The user’s final step is to unlatch the treasure chest’s latch mechanism and open the lid (treasure chest, hardware and outer lava layer not pictured).
PrototypeS
Several different design models were created, tested, and altered before the final model was completed.
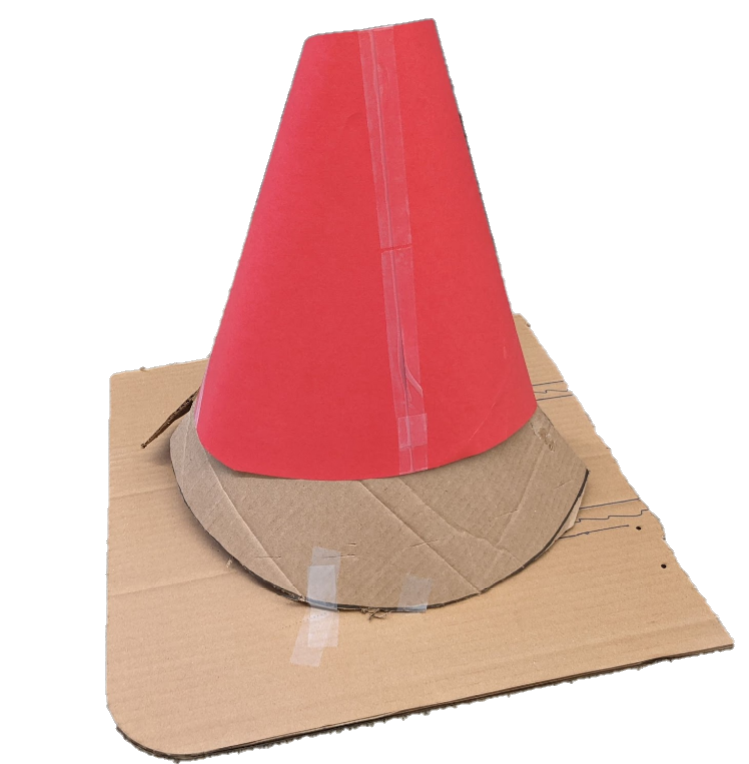
Prototype # 1
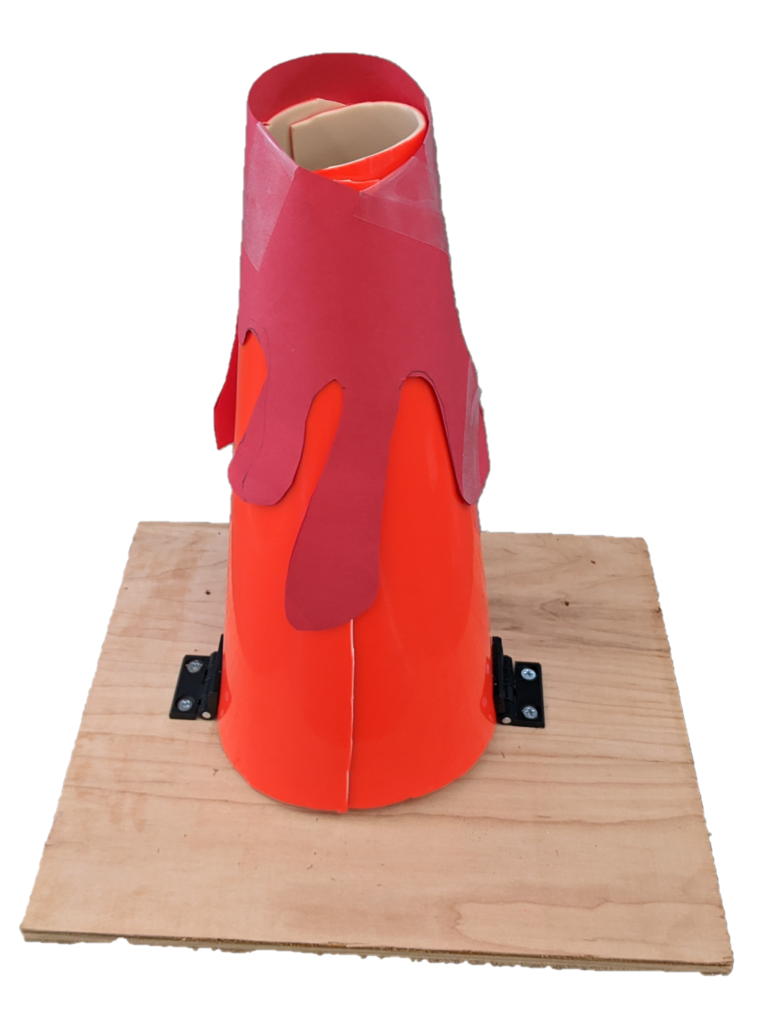
Prototype #2
![]()
Final Version
Proposed functionality of Treasure Mountain
The completion of this functional prototype provided us with a a rough idea on the size of the toy overall and helped
us to understand/develop the mechanics of how the actual toy would work and operate.
Starting position

Removing the lava top

Panels fall down
Unstrapping the lid

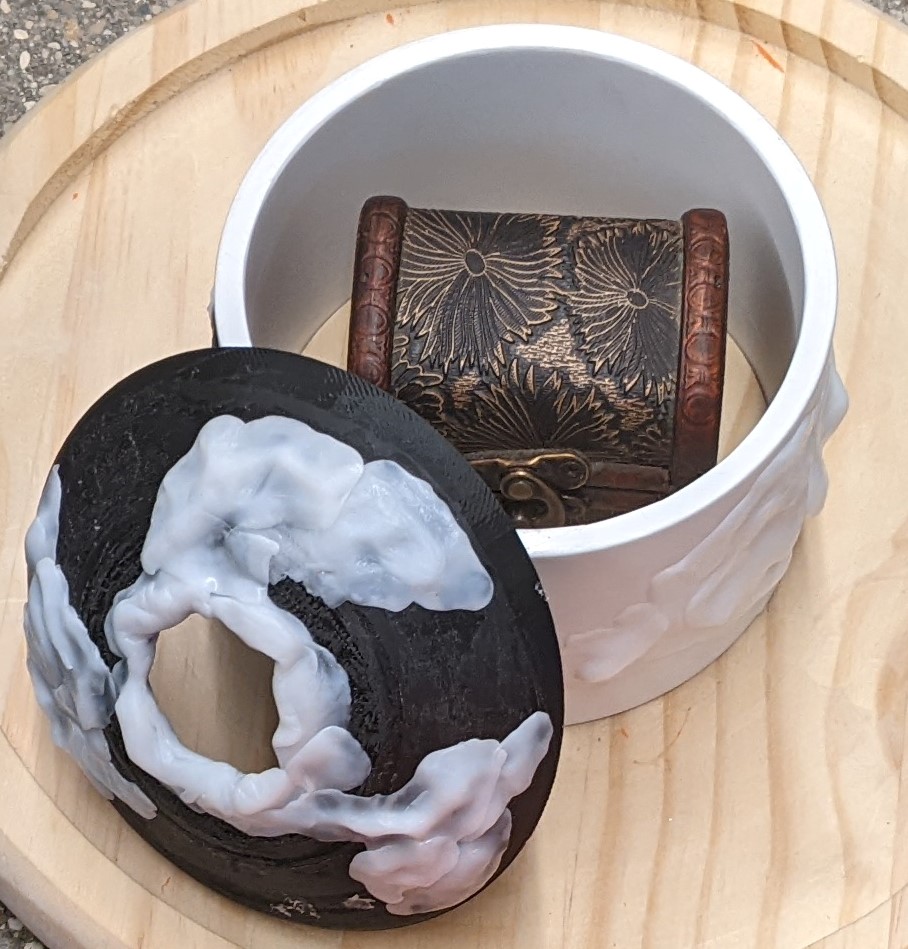
Opening up the treasure chest inside
Child claims their reward
Construction & Finishing touches :
Shown below are the progress photos of Treasure Mountain becoming a reality.
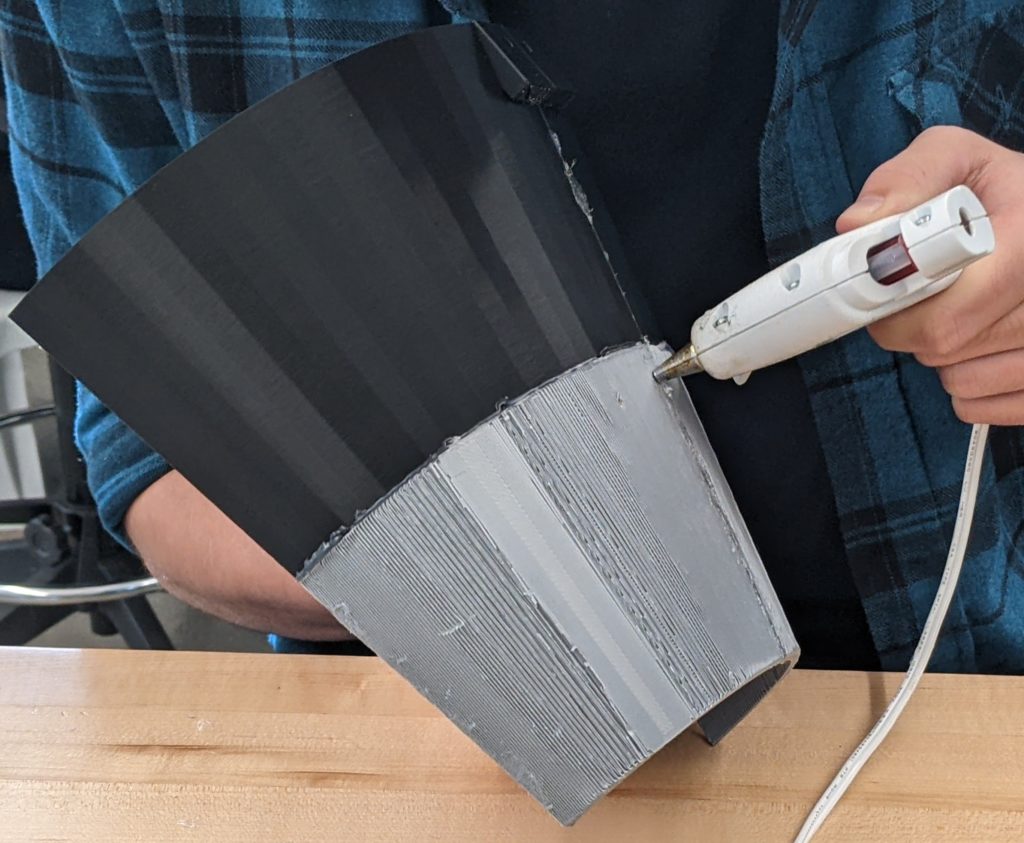
(Gluing the panels together)

(Cutting the wooden base)
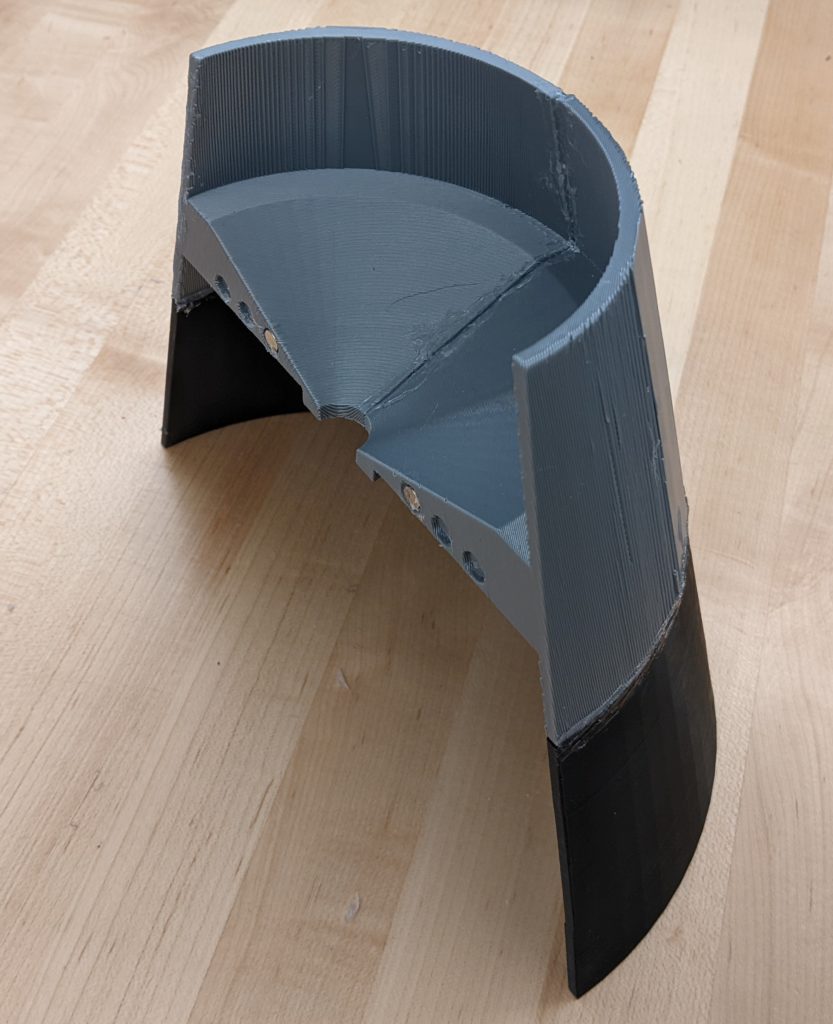 (Panel Half)
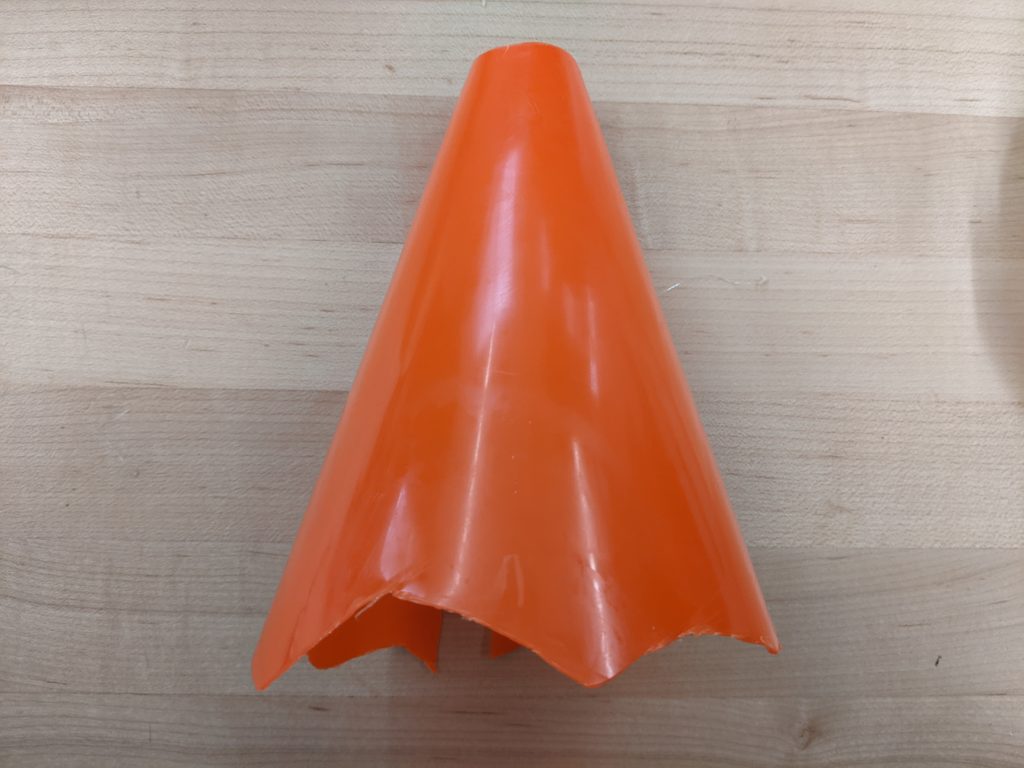 (Creating the lava top)
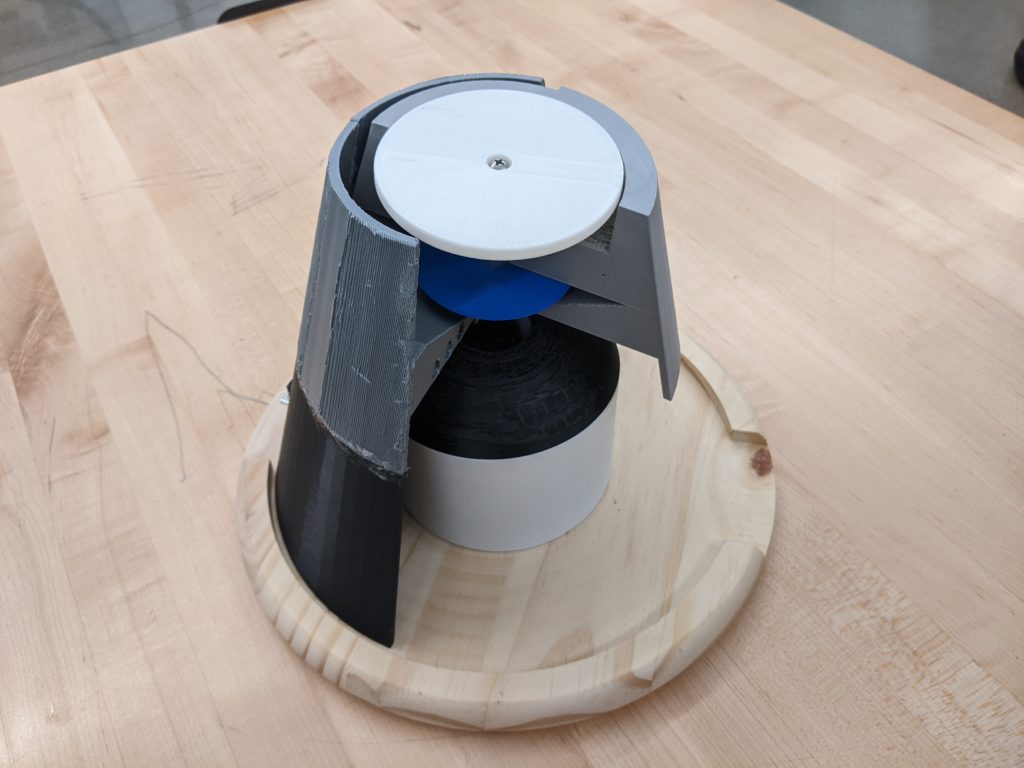
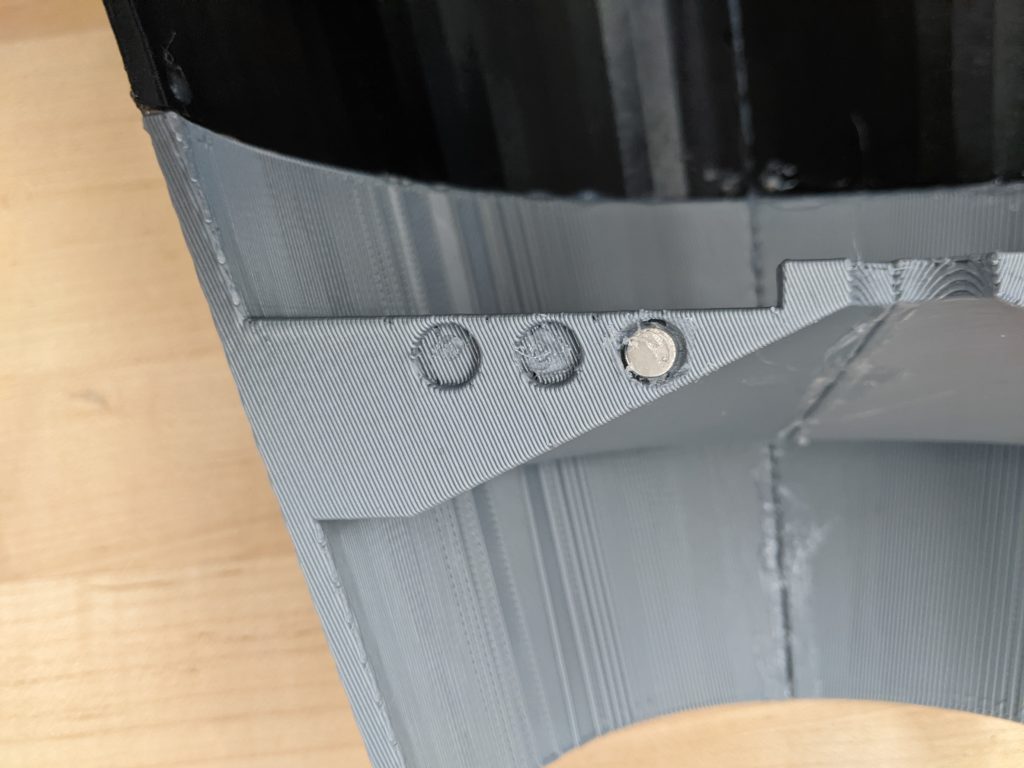
(Putting together the button mechanism and panels)
(Put together toy, Before painting)
![]()
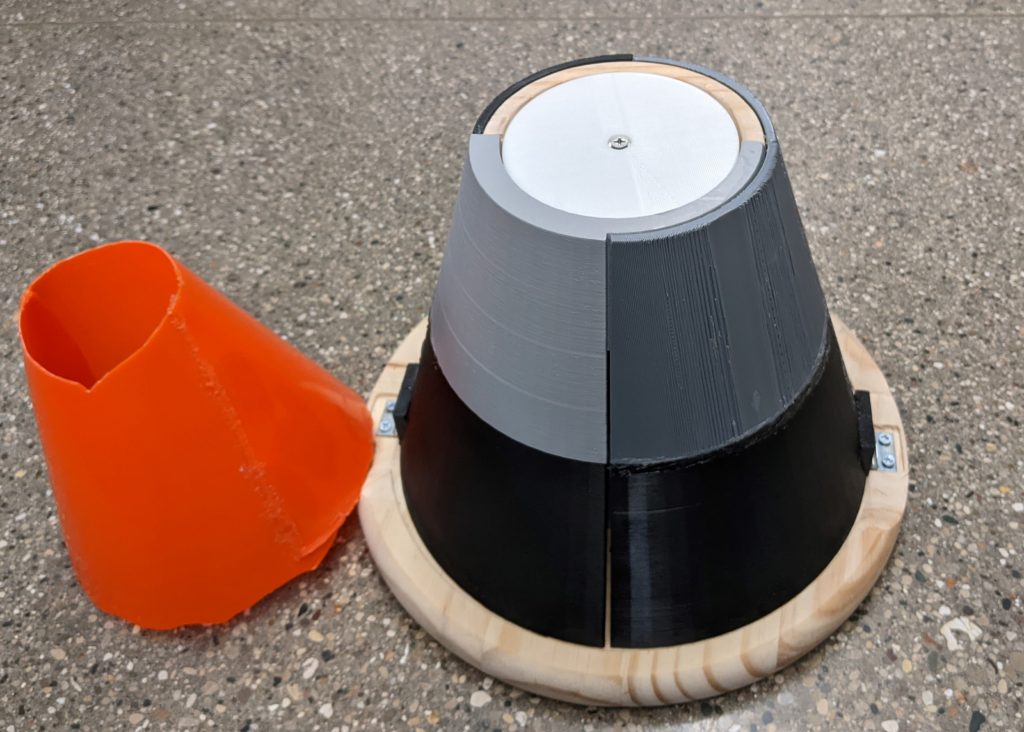
(Completed Treasure Mountain)
(Putting in the magnets)
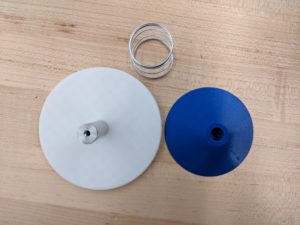
(Wedge and button pieces)
(Creating the enclosed cavern)
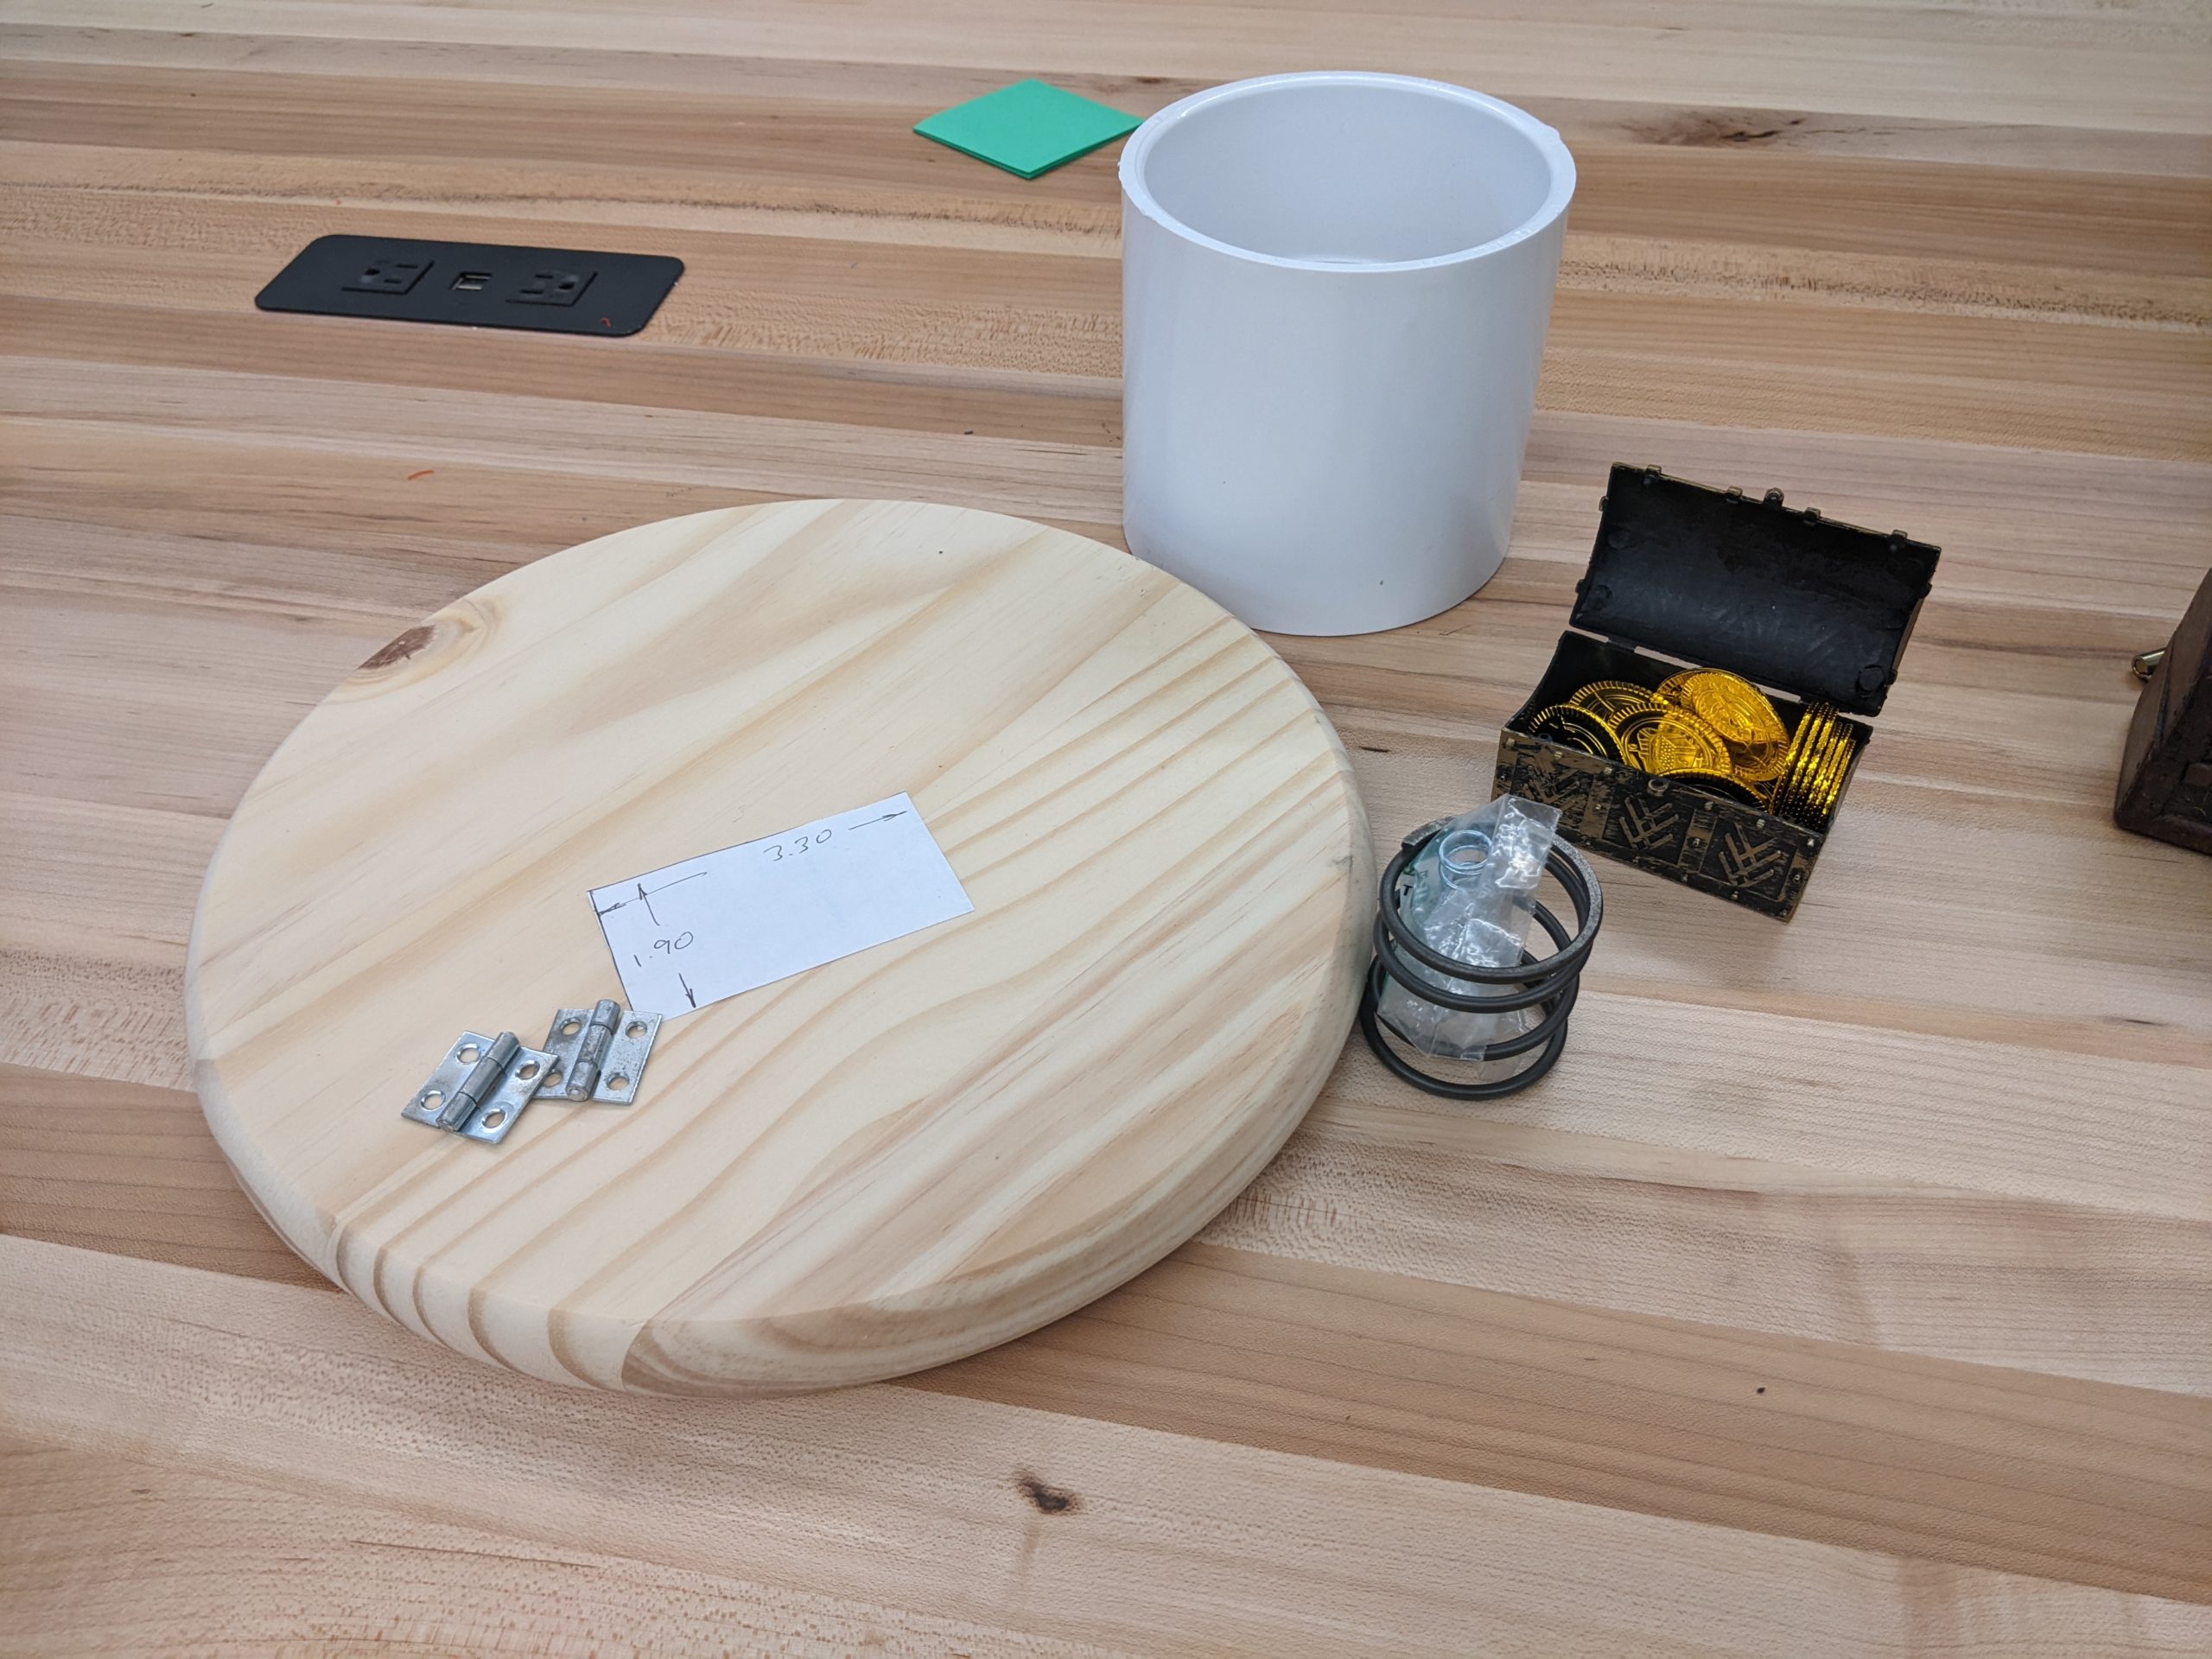 (Building the base structure)
Components & HOW IT WORKS:
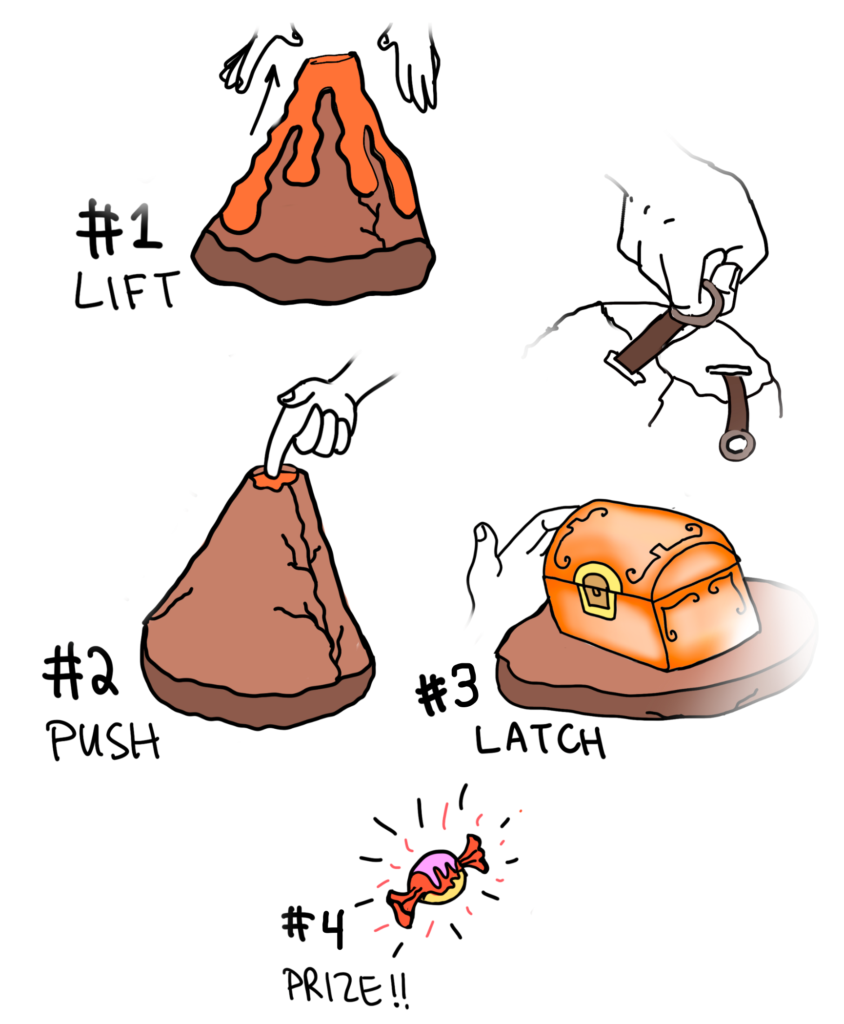
Shown below is an overview of the different layers that treasure mountain features as well as what the child needs to do to solve each puzzle.
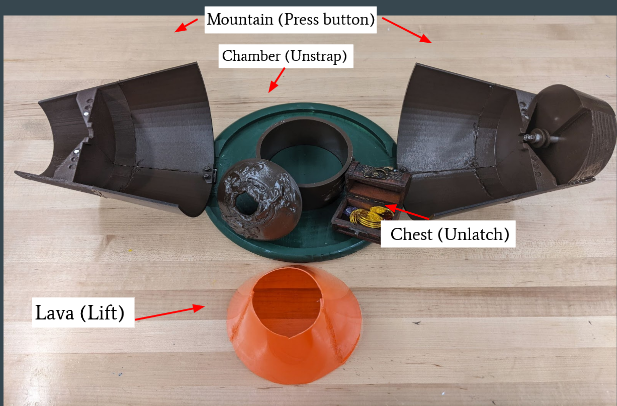
(Overview Of Treasure Mountain)

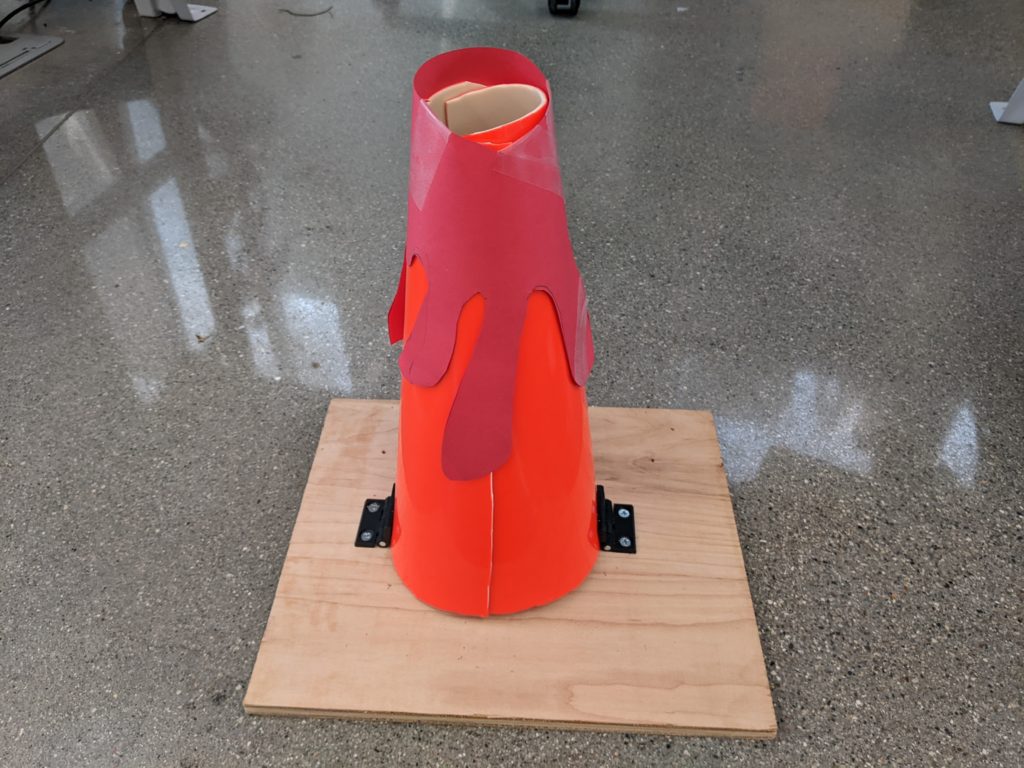
(Step One: Lift the Lava Top)
(Step Two: Press the revealed button)

(Step Three: Pry open the panels)
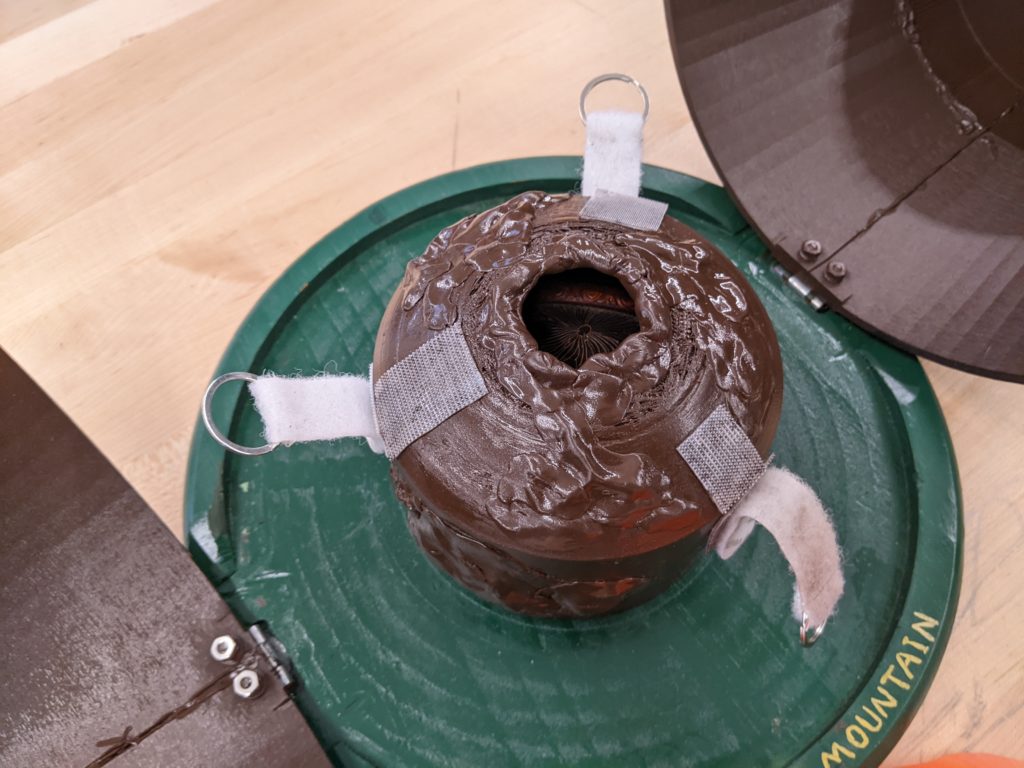
(Step Four: Unstrap the Velcro)

(Step Five: Open up the chest)
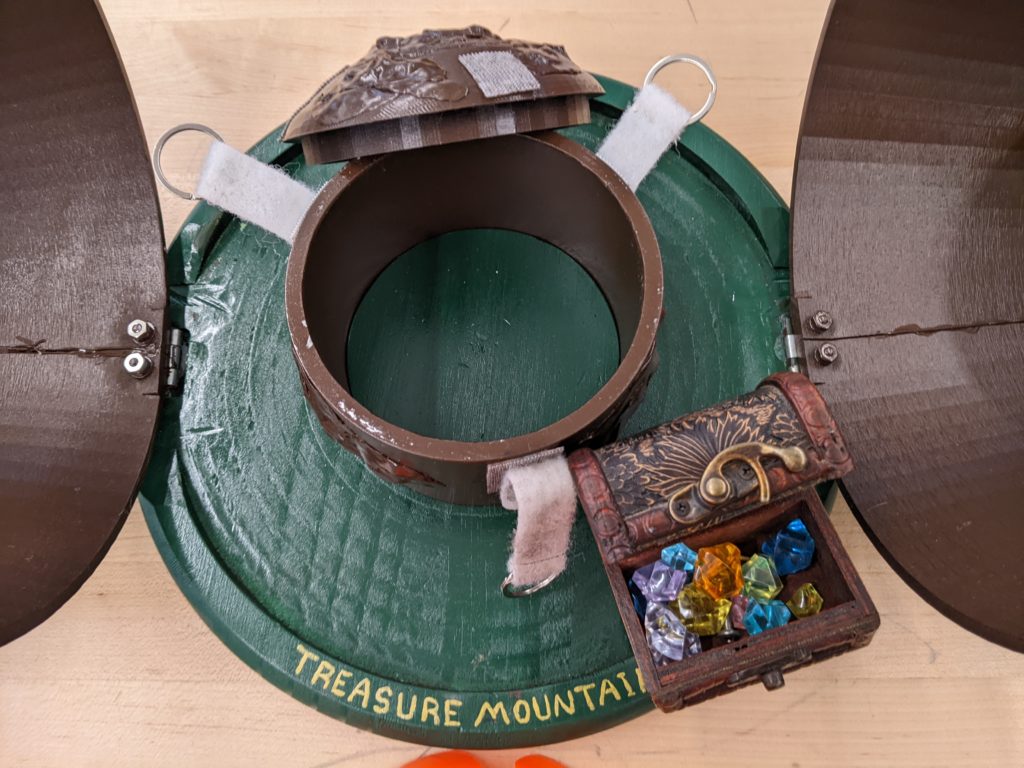
(Step Six: Claim your prize!)
Video:
Shown below is a demonstration video of someone using Treasure Mountain.
Showcase:
My team and I presented our toy to REACH services as well as fellow students at our college, It was quite an exciting day for all of us as we got to show off all our hard work and dedication.
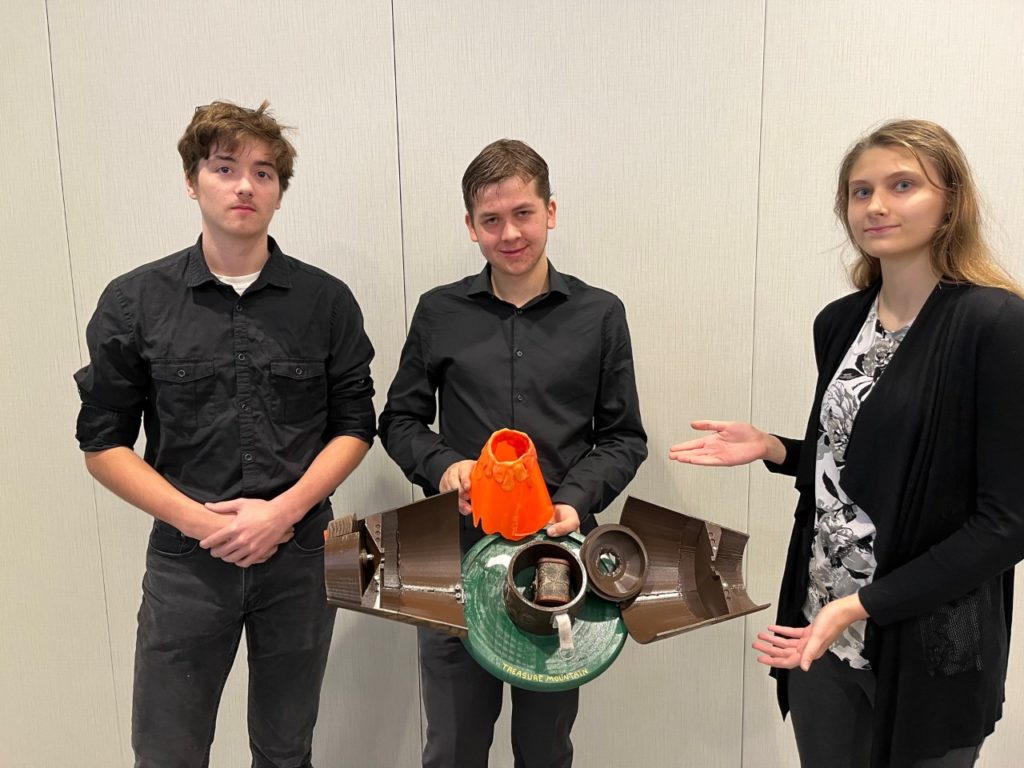
My team posing with Treasure Mountain

Skills gained & takeaway:
- Enhanced my skills/knowledge of SOLIDWORKS
- Operation of essential tools such as a lathe handle & milling machine
- Practiced time management, effective communication, and design skills.
- Presentation and technical write ups
Tackling such a unique and creative project allowed me to enhance my knowledge of engineering principles, and practice/build upon my design skills, allowing me to use what I learned in class, as well as manage my time effectively to ensure I met the deadlines.